BOW TIES WITH TOMATOES, FETA, AND BALSAMIC DRESSING
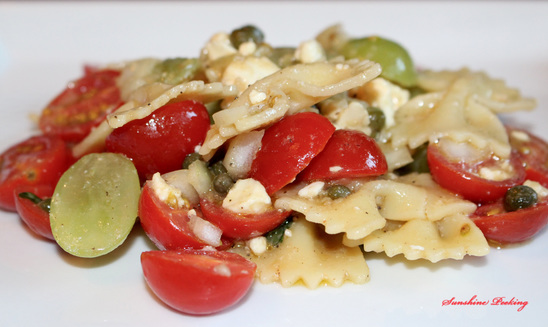
Tastē Tuesday~ We don't eat an incredible amount of vegetarian dinners because inevitably I end up making more food later that night because someone is hungry. On top of that, many pasta salads are good as side salads but not necessarily the main course. Occasionally I take my chances though, and the pasta salad below was a unique and delicious addition to my limited repertoire. Served with a heartier veggie side dish like sautéed asparagus or zucchini, this pasta salad offers enough different ingredients for a satisfying dinner. It is also adapted from Cooking Light - quick, healthy, and pasta - definitely a recipe that will be made again! Make sure to check out the notes at the bottom of the recipe.
Bow Ties with Tomatoes, Feta, and Balsamic Dressing
Serves 3-4
Ingredients
6 ounces uncooked farfalle (bow tie pasta)
1 cup green seedless grape, halved
1⁄3 cup thinly sliced fresh basil
2 tablespoons white balsamic vinegar
2 tablespoons chopped shallots
2 teaspoons nonpareil capers
1 teaspoon Dijon mustard
1⁄2 teaspoon minced fresh garlic
1⁄2 teaspoon salt
1⁄4 teaspoon fresh ground black pepper
4 teaspoons extra virgin olive oil
1(4 ounce) package crumbled reduced-fat feta cheese
DIRECTIONS
Cook pasta according to package directions, omitting oil. Drain. Combine cooked pasta, tomatoes, grapes, and basil in a large bowl.
While pasta cooks, combine vinegar and next 6 ingredients (through pepper) in a small bowl, stirring with a whisk. Gradually add oil to vinegar mixture, stirring constantly with a whisk. Drizzle vinaigrette over pasta mixture; toss well to coat. Add cheese; toss to combine.
Notes:
* Unless you are in a pinch, use white balsamic vinegar. Although there won't be a huge taste difference, regular balsamic will lend a sweeter flavor and darken the dish. The white balsamic vinegar will enhance the aesthetic aspect of the dish.
* When cutting the basil, use an easy technique called "chiffonade." Stack a few basil leaves together, roll them length-wise into a long, skinny roll, Slice horizontally (perpendicularly to the roll) and separate. A few quick slices will render long, thin ribbons of basil.
The thought crossed my mind that chicken could probably be added to this dish. If you give it a try, let me know how it works out!
Spaghetti For Spring
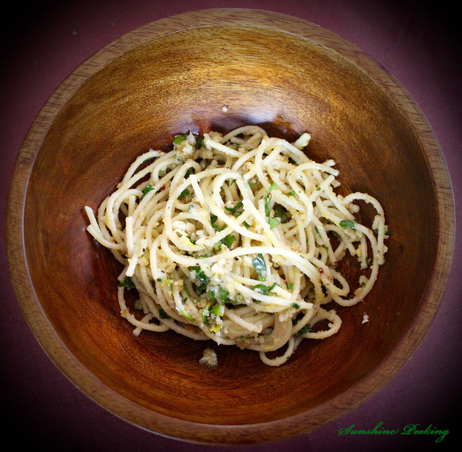
Tastē Tuesday~ As promised a couple of weeks ago, below is a recipe that includes lemons and isn't a dessert! Spaghetti with Lemon and Parmesan is similar to Spaghetti al Limone, but without the cream that often accompanies it. This is a fresh, healthy, and easy recipe, quick enough for a weeknight meal but yummy enough for a weekend alfresco dinner. It is easily modified to be gluten-free by using gluten-free pasta and breadcrumbs. With just 10 ingredients, most of them pantry staples, Spaghetti with Lemon and Parmesan is also easy on the wallet. Paired with a sparkling white, such as Ca’ del Bosco NV Brut or a citrussy Sauvignon Blanc, with mere minutes of preparation, you will find yourself transported to the country-side of Italy.
Spaghetti with Lemon and Parmesan
Serves 3
Adapted from the Williams-Sonoma Test Kitchen
Ingredients
1/2 pound dry spaghetti
1/2 cup plus 1 Tbs. olive oil
1/4 cup dried bread crumbs
Kosher salt and freshly ground pepper
4 garlic cloves, minced
1/4 cup grated Parmesan cheese, packed
Grated zest 1 medium-size lemon
3 tablespoons fresh lemon juice
1/2 cup minced fresh flat-leaf parsley
Pinch of red pepper flakes
Directions:
Bring a large pot two-thirds full of salted water to a boil over high heat. In a large fry pan over medium heat, warm the 1 Tbs. olive oil. Add the bread crumbs and sauté until browned, about 4 minutes. Season with salt and pepper and transfer to a small bowl. In the same pan over low heat, warm the remaining 1/2 cup olive oil. Add the garlic and sauté until fragrant, 1 to 2 minutes. Remove from the heat and stir in the Parmesan and the lemon zest and juice. Season with pepper.
Add the pasta to the boiling water and cook according to package directions. Reserve 1/2 cup of the pasta cooking water. Drain pasta and add to the sauce (in skillet). Toss, adding the reserved pasta cooking water as needed to achieve a silky consistency. Add the bread crumbs, parsley, red pepper flakes and salt to taste. Toss to combine and serve immediately.
**The lemon juice is an approximate. I had a nice juicy lemon and did not measure the juice, so the 3 T is a rough estimate. The lemon taste is not overpowering in the recipe, so if you really like that citrus taste, you can always add a bit more.
SIMPLE FRUIT SALAD
Tastē Tuesday~ I can't read a magazine without dog-earing at least one page. Multiple magazines take up space quickly so over the years my dog-earing has morphed into ripping out pages and filing them in various binders and folders. Recipes are a particular weakness, and after filling two three-ring binders and an accordion file, I eventually unsubscribed to all of the magazines I used to receive. For some reason, a few of them insist on sending me free monthly magazines, even tracking me down after the cross-country move. I am not one to turn away free stuff though I am sure my husband would intercept them and put them into the recycling bin before they reached the mailbox if he could!
I do frequently dig into the binders to hunt for new recipes. However, I have found that the least accessed recipe file is titled Side Dishes. Most side dishes make recipes that will feed at least 4-6 people, and we just don't need that much food until the boys get a bit older. I modify plenty of main dishes to feed our required 2-3, but for the work that many side-dishes require, a salad or simple veggies is my go-to side dish right now. Lucky for me, our church has a monthly potluck lunch. The church potluck = heaven for a girl who likes to try new recipes! I mix something up, quietly slip it onto the table in-between a bunch of other platters, and slyly watch to see if it was a worthy undertaking or an unsuccessful experiment. Important to note: presentation is key. There is a reason that fancy restaurants plate their food with style! If something looks delicious, most people will put it on their plate. So, I always help myself to a taste test. An empty bowl doesn't always mean the food didn't end up in the trash can after a temporary layover on someone's plate.
The fruit salad seen below was completely gone at the end of the church potluck...and it was good. Better yet, it was simple to make, and could be made year-round even during the winter months when a lot of fresh fruit can be difficult to find. I didn't spend a lot of time making mine look fancy, but it would be easy to make an alternating spiral with the strawberries and kiwi for a festive Christmas party or otherwise place the fruit creatively on top for a fun or pretty presentation.
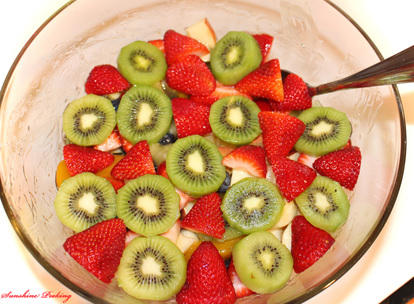
Simple Fruit Salad
Ingredients
1 (20 ounce) can pineapple chunks, juice reserved
2 apples, cored and chopped
1 (21 ounce) can peach pie filling
2 bananas, peeled and chopped
3 kiwis, peeled (2 sliced, 1 chopped)
6 ounces blueberries
1 pint strawberries
In a medium-size bowl, toss the chopped apples in reserved pineapple juice. Allow to sit for 5 to 10 minutes. Remove apples from juice, reserving juice. In a large salad bowl, combine the peach pie filling, pineapple chunks, chopped kiwi, blueberries, and apples. Add bananas to reserved juice and let sit for 5 to 10 minutes. Chop 1/2 of the strawberries, slice the other half. Remove bananas from juice and add to pie filling mixture. Add chopped strawberries to mixture and gently mix together. Arrange sliced strawberries and sliced kiwis decoratively on top.
**Soaking the bananas and apples in the pineapple juice keeps the fruit from turning brown.
**Although the peach pie filling might seem odd, it provides a subtle no-fat sauce. Look for one (like Lucky Leaf) that does not contain high fructose corn syrup.
**This is extremely versatile: you could use many different kinds of fruit, just try to keep the volume of the fruit equal to the quantities above. Avoid fruits, such as watermelon and raspberries, that won't hold their shape when tossed with the other fruit.
LamB cake 3/29/2016
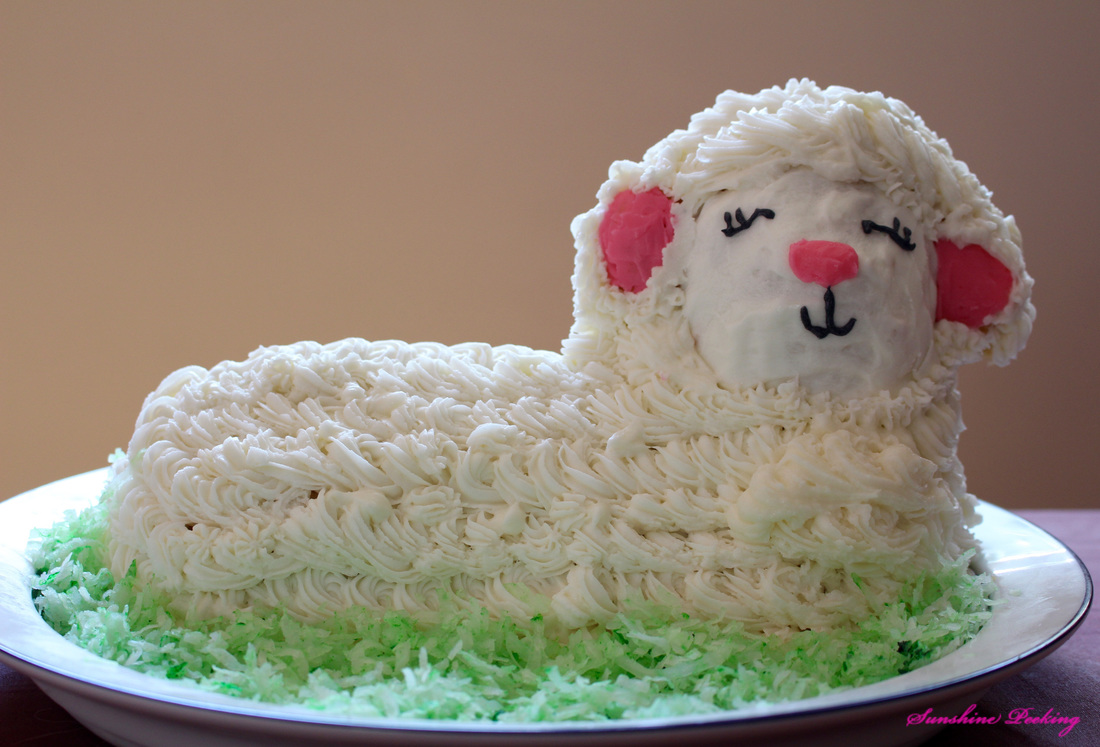
Tastē Tuesday~ Happy Belated Easter! My family is big on holiday traditions. Since we move around a bit, keeping some things the same, and special, year after year, helps us feel like we are still providing stability and normalcy to the boys. Many of our traditions revolve around food, and Easter dinner has always been a bit lacking. My hubby grew up with a lamb cake for Easter dessert, but this was completely foreign to me and, to be honest, a lot of the lamb cakes I saw online looked kind of scary...not exactly what I wanted on my table for a holiday dinner. This year, I was at a loss, so I asked my mother-in-law if she still had her pan. She did, and it arrived on my doorstep a few days before Easter! I also found out that the Easter Lamb Cake is not just my husband's family tradition, but an old European tradition ranging in countries from Germany, Poland, Austria, and France to Italy. Here in the U.S., the lamb cake was most popular in the 1940's and '50's. The tradition seems to have faded, but it is relatively easy to find and buy a lamb cake mold, so I expect our Easter lamb was not the only lamb cake to grace an Easter table on Sunday. That said, this year's cake was an experiment in cake, frosting, and technique. Next year I look forward to applying some lessons learned, and I will share some more tidbits then. What are some of your interesting Easter traditions?
I hope you all had a blessed Easter and were able to rejoice in our risen Savior not just a bunch of chocolate candy. Easter is not about a bunny...it's about The Lamb!
"The next day John saw Jesus coming toward him and said, “Look, the Lamb of God, who takes away the sin of the world!" John 1:29
I hope you all had a blessed Easter and were able to rejoice in our risen Savior not just a bunch of chocolate candy. Easter is not about a bunny...it's about The Lamb!
"The next day John saw Jesus coming toward him and said, “Look, the Lamb of God, who takes away the sin of the world!" John 1:29
Lemon Poppy Seed Bread 3/23/2016
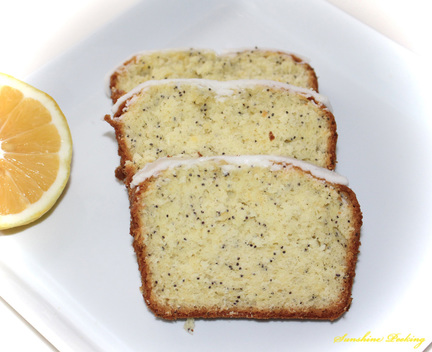
Tastē Tuesday (a day late!)~ In my continuing quest to put all of my lemons to good use, I made some lemon poppy seed bread this week. This is considered one of the "quick breads" - a fabulous alternative when you are looking for something that can be made, baked, and even consumed in a short period of time (no rising/leavening necessary). I have eaten this for both breakfast and dessert. Leaving off the icing will provide a less sweet alternative if you prefer to have a breakfast treat. This particular recipe yields a more cake-like consistency. If you enjoy your poppy seed bread more pound-cake-like, this is not the recipe for you. Lucky for the pound cake lovers out there, poppy seed bread is one of my husband's favorites, and I made extra icing, so a lemon poppy seed pound cake is soon to follow. In case you were worried that we eat sweets for breakfast, lunch, and dinner, I have two main course recipes that utilize spring-time lemons and are great for the warm weather spring brings. I will post them in the upcoming weeks. In the meantime, if you are looking for an easy addition to your Easter brunch or in need of an item to contribute to a bake sale, this recipe ensures crumbs will be the only thing left on the plate.
Lemon Poppy Seed Bread
Yields: 2 big loaves (8.5"x4.5"x2.5")
1 package white cake mix
1 package instant coconut (or coconut cream) pudding
2 tablespoons poppy seeds
4 eggs
1/2 cup oil
1 cup - 2T hot water
1 T lemon zest
2 T fresh lemon juice
4 T sliced almonds (optional)
Grease loaf pans. Mix all ingredients except for sliced almonds together and beat for 4 minutes. Pour equally into 2 loaf pans. Sprinkle each loaf with 2 tablespoons almonds. Cook at 350 degrees for 35 minutes or until done. Tent foil if necessary to prevent top from too much browning. Cool on metal rack. Ice if desired once completely cooled.
Icing:
1/4 cup fresh lemon juice
Add powdered sugar until desired consistency (~2 cups)
**The batter can also be used to make muffins.
Pi Day 3/15/2016
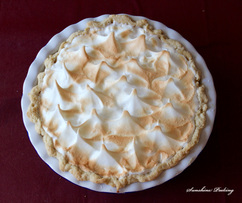
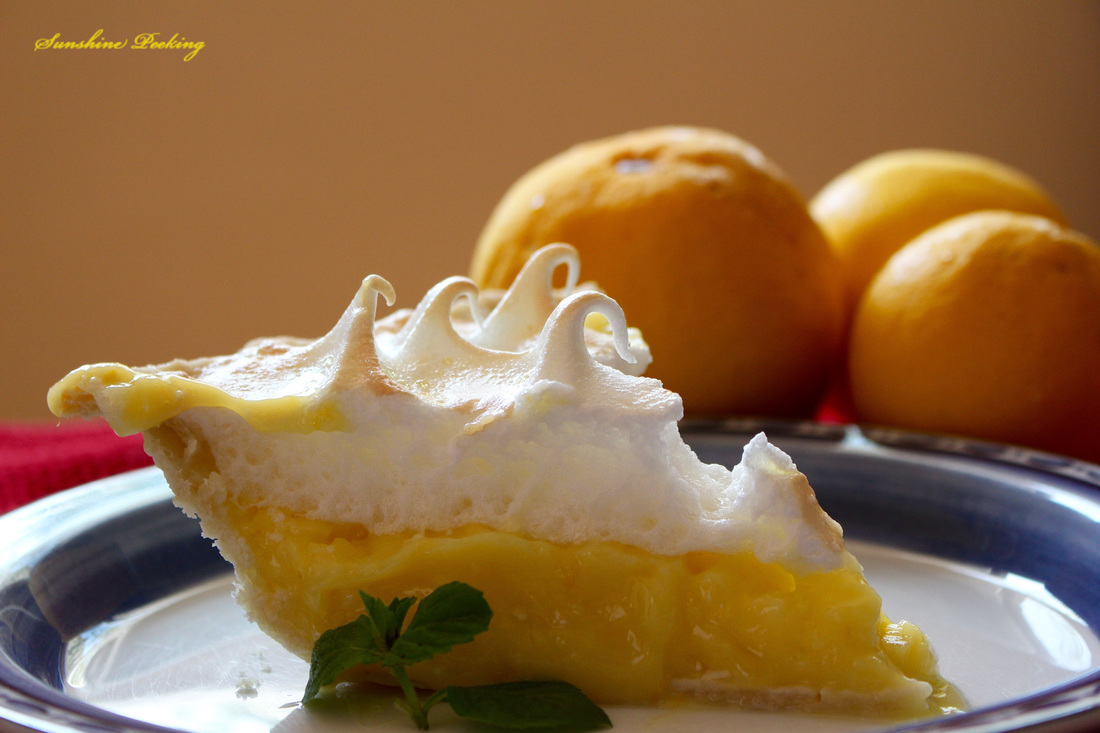
Tastē Tuesday~ In honor of Pi Day yesterday and because I still have 18 pounds of lemons in my refrigerator, I made my first lemon meringue pie on Monday. Being my first lemon meringue pie, this is not a recipe that I can say has been through strenuous comparisons or is a tried and true. However, it was tasty and taught me a couple of lessons for the next time I make it. My husband said it was good, and he is picky with his lemon meringue. As for Pi Day, it is actually to honor 3.14, so here are a few quick fun facts:
Lemon Meringue Pie
Adapted from Emeril Lagasse
Ingredients:
1 baked pie crust (use your favorite homemade or a store bought)
1 1/4 cups granulated sugar
5 tablespoons + 1 teaspoon cornstarch
1 cup skim milk
1/2 cup cold water
1/8 teaspoon salt
6 large egg yolks
2/3 cup + 1 1/2 tablespoons fresh lemon juice, strained
2 tablespoons finely grated lemon zest
2 tablespoons cold, unsalted butter, cut into pieces
~~~~~~~~~~~~~~~~~~~~~~~~~~~~~~~~~~~~~~~~~~~~~~~~~~
4 large egg whites
1/4 teaspoon cream of tartar
1/8 teaspoon clear vanilla
7 tablespoons powdered sugar
Directions:
Combine the granulated sugar, 5 T. cornstarch, milk, water, and salt in a large, non-reactive saucepan. Whisk to combine, and bring to a simmer over medium heat, whisking occasionally. Cook the mixture until it reaches a simmer and begins to thicken. Continue to cook until the mixtures turn clears, at least another 4 to 5 minutes. Whisk in the egg yolks, 2 at a time. Slowly add the lemon juice, whisking constantly. Add the zest and butter, 1 piece at a time, whisking constantly. Return mixture to a simmer. Whisk until the mixture is nice and thick. Remove from the heat and pour immediately into the prepared pie crust.
In a mixing bowl, beat egg whites, cream of tartar, 1 teaspoon cornstarch, and vanilla with an electric mixer until soft peaks form. Beating constantly, gradually add the powdered sugar and beat just until glossy stiff peaks form, Do not over beat, or the meringue will be difficult to spread.
Spread the meringue evenly over the pie using a rubber spatula. Smooth it all of the way to the crust so the crust creates a seal with crust. Make decorative peaks in the meringue using the back of a spoon.
Preheated oven to 325 degree F oven. Cook pie 14 to 16 minutes or until browned on top. (To quickly cook the meringue, preheat the broiler (low not high) with the rack in the middle position. Place the pie under the broiler and cook until the meringue is set and golden brown, 1 to 2 minutes, watching carefully to avoid burning and turning to create even browning.)
Transfer the pie to a wire rack to cool completely before serving. Refrigerate once cooled or before serving if cold pie is desired.
Lessons Learned = Tips for You!
* I have made lemon curd a few times and never had in issue with it setting up, but I didn't cook it long enough, and it wasn't as firm as I would have liked it. Make sure your mixture is thick before pouring into the pie pan.
* You want to spread your meringue over hot filling to cook the meringue from the bottom up, creating a bond between the two so they don't separate and to prevent the meringue from weeping (small beads of moisture that form on top).
* Beading can also form if your oven is too hot...so if you don't want to spend another 15 minutes browning the meringue, the broiler method works great (that is what I used as I had already devoted too much time to Pi Day!), however, it might result in some weeping. The safest bet is to slowly brown at 325.
* Cool completely! All aspects of the bottom of the pie pan, even the very middle, needs to be room temperature before cutting.
- Pi Day started 28 years ago by a Physicist who wanted to celebrate the day with a few colleagues. It has spread...so that we all have an excuse to eat pie :).
- It is not only Pi Day, but Albert Einstein's birthday.
- In case you forgot early math classes, pi = 3.1415.....
- Next year, remember Pi Day. A number of businesses are jumping on the bandwagon and starting to offer sales to celebrate (ex: Whole Foods sells pies for $3.14 off and many retailers have 31.4% sales throughout the day).
Lemon Meringue Pie
Adapted from Emeril Lagasse
Ingredients:
1 baked pie crust (use your favorite homemade or a store bought)
1 1/4 cups granulated sugar
5 tablespoons + 1 teaspoon cornstarch
1 cup skim milk
1/2 cup cold water
1/8 teaspoon salt
6 large egg yolks
2/3 cup + 1 1/2 tablespoons fresh lemon juice, strained
2 tablespoons finely grated lemon zest
2 tablespoons cold, unsalted butter, cut into pieces
~~~~~~~~~~~~~~~~~~~~~~~~~~~~~~~~~~~~~~~~~~~~~~~~~~
4 large egg whites
1/4 teaspoon cream of tartar
1/8 teaspoon clear vanilla
7 tablespoons powdered sugar
Directions:
Combine the granulated sugar, 5 T. cornstarch, milk, water, and salt in a large, non-reactive saucepan. Whisk to combine, and bring to a simmer over medium heat, whisking occasionally. Cook the mixture until it reaches a simmer and begins to thicken. Continue to cook until the mixtures turn clears, at least another 4 to 5 minutes. Whisk in the egg yolks, 2 at a time. Slowly add the lemon juice, whisking constantly. Add the zest and butter, 1 piece at a time, whisking constantly. Return mixture to a simmer. Whisk until the mixture is nice and thick. Remove from the heat and pour immediately into the prepared pie crust.
In a mixing bowl, beat egg whites, cream of tartar, 1 teaspoon cornstarch, and vanilla with an electric mixer until soft peaks form. Beating constantly, gradually add the powdered sugar and beat just until glossy stiff peaks form, Do not over beat, or the meringue will be difficult to spread.
Spread the meringue evenly over the pie using a rubber spatula. Smooth it all of the way to the crust so the crust creates a seal with crust. Make decorative peaks in the meringue using the back of a spoon.
Preheated oven to 325 degree F oven. Cook pie 14 to 16 minutes or until browned on top. (To quickly cook the meringue, preheat the broiler (low not high) with the rack in the middle position. Place the pie under the broiler and cook until the meringue is set and golden brown, 1 to 2 minutes, watching carefully to avoid burning and turning to create even browning.)
Transfer the pie to a wire rack to cool completely before serving. Refrigerate once cooled or before serving if cold pie is desired.
Lessons Learned = Tips for You!
* I have made lemon curd a few times and never had in issue with it setting up, but I didn't cook it long enough, and it wasn't as firm as I would have liked it. Make sure your mixture is thick before pouring into the pie pan.
* You want to spread your meringue over hot filling to cook the meringue from the bottom up, creating a bond between the two so they don't separate and to prevent the meringue from weeping (small beads of moisture that form on top).
* Beading can also form if your oven is too hot...so if you don't want to spend another 15 minutes browning the meringue, the broiler method works great (that is what I used as I had already devoted too much time to Pi Day!), however, it might result in some weeping. The safest bet is to slowly brown at 325.
* Cool completely! All aspects of the bottom of the pie pan, even the very middle, needs to be room temperature before cutting.
SNickerdoodles
2/22/2016
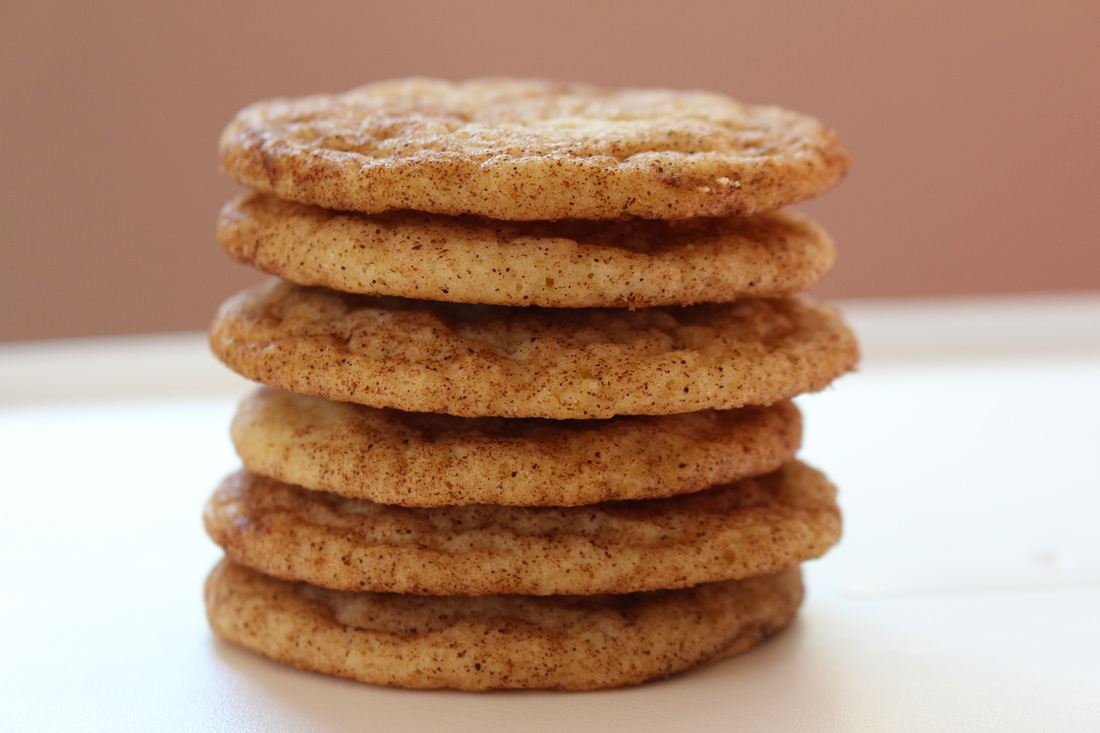
Tastē Tuesday~ I have spent the better part of the last two days researching the in's and out's of the CBC (complete blood count) and CMP (comprehensive metabolic panel) in an effort to aide my son's doctors in trying to figure out his complex little body. A medical degree would have served me much better than a political science degree! A warm, chewy snickerdoodle would really provide a moment of comfort right now - too bad I made these a couple of weeks ago and not even crumbs remain.
I much prefer an ooey gooey chocolate chip cookie to a snickerdoodle, but snickerdoodles are one of my husband's favorites, and this super easy recipe makes whipping out a batch quite convenient. This recipe yields a thin but soft and chewy cookie; just make sure to check out the helpful hints below!
Snickerdoodles
yields ~24 cookies
Ingredients
1 cup butter, softened
1 1/2 cups sugar
2 large eggs
2 3/4 cups flour
2 teaspoons cream of tartar
1 teaspoon baking soda
1/4 teaspoon salt
2 tablespoons sugar
2 teaspoons cinnamon
Directions
Preheat oven to 350 degrees. Mix butter, 1 1/2 cups sugar and eggs thoroughly in a large bowl. Combine flour, cream of tartar, baking soda and salt in a separate bowl. Blend dry ingredients into butter mixture. Chill dough, and chill an ungreased cookie sheet for 15 minutes in the refrigerator. Meanwhile, mix 2 tablespoons sugar and 2 teaspoons cinnamon in a small bowl. Scoop 1 inch portions of dough into the sugar/cinnamon mixture. Gently rolls balls, coating the dough in its entirety. Place on chilled cookie sheet. Bake 10 minutes or until very lightly golden. Remove from pan onto wire cooling rack immediately.
Helpful Hints
*You don't want to overbake these cookies, so pick a tablespoon measurer or other small scoop and make uniform cookies that will cook evenly.
*Chilling the dough will help them retain their form while cooking. In between batches, put your dough back into the refrigerator.
*I love cooking...not so much cleaning, so I don't use a refrigerated cookie sheet for each batch - just the first two. However, if you use a hot cookie sheet, the cookies will begin to spread right when they are placed on the sheet - you don't want this. Use two cookie sheets, and make sure the pan is at least at room temperature when you scoop the dough onto it.
Freshly Squeezed Lemonade
2/9/2016
Tastē Tuesday~ Little boy #2 and I have been hard at work putting the well know quote, “When life gives you lemons, make lemonade” into practice. A couple of other lemony quotes: “When life gives you lemons, keep them...hey, free lemons!” and “Roses are red, violets are nice, when life gives you lemons, add vodka and ice.”
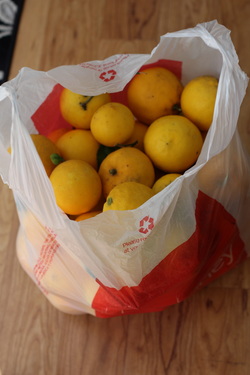
I must say, I have never put so many quotes into practice in one short day! We were walking home from church a couple of weeks ago, and a man in his driveway asked if we wanted a bag of lemons. I’m not one to pass up free stuff...especially lemons, so I eagerly accepted. I use lemon juice in many recipes and over the years have transitioned almost exclusively from the lemon concentrate bought on the grocery store shelves to fresh lemons. My sis has a lemon tree, so every once in awhile I get a bag full from her. Being spoiled on free, fresh off-the-tree lemons makes buying a lemon especially painful. The key to the story is that when the man offered a bag of lemons, I didn’t realize I would be lugging at least 15 pounds of lemons home! I had a few lemons in the frig from my sister’s last installment and another bag of lemons from her on the way. If you need a lemon...stop by my house!
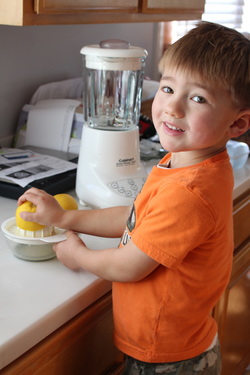
Thankfully, the man kindly suggested I make some freshly squeezed lemonade as we walked away toward our house. Little boy #2 heard and thought it quite a delightful idea. I had never made fresh lemonade before and now had a large bag of incentives on my kitchen floor.
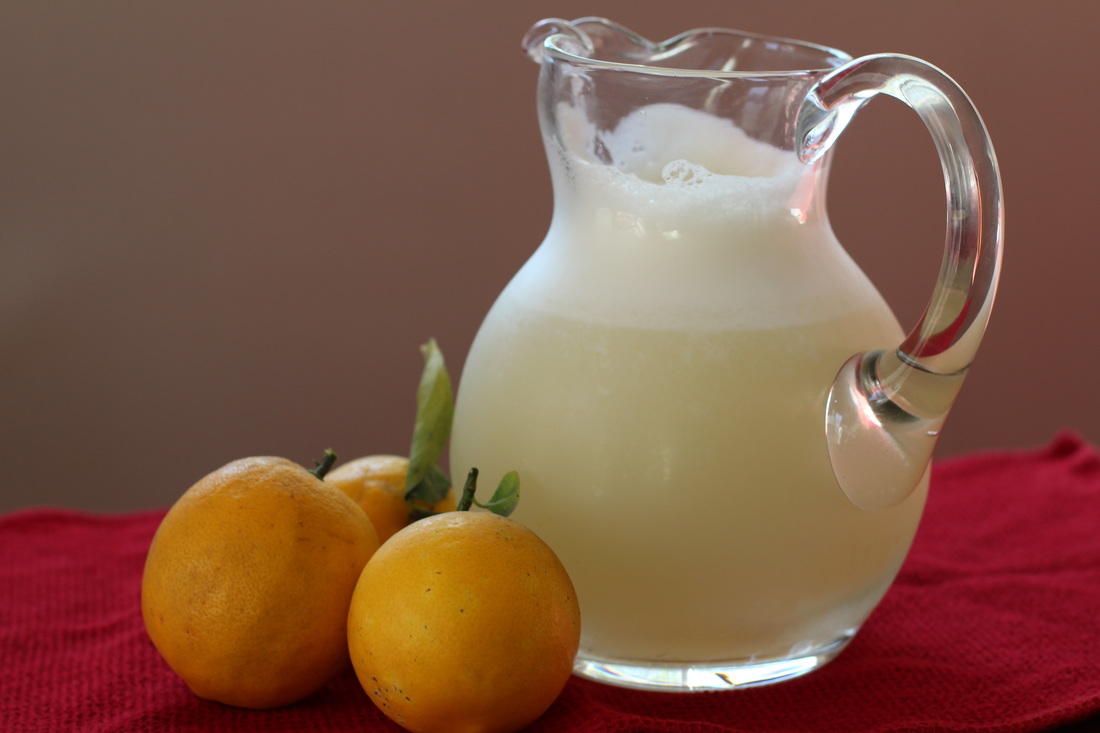
The thing about lemonade recipes is the big “to taste” factor. When I look for a recipe, I actually am looking for measurements, not “a few lemons, to taste” followed by, “some sugar, to taste,” etc. Obviously, everyone’s taste buds do differ, so you can alter this to your taste by reducing or increasing the sugar and water. However, I have made a few batches of the lemonade recipe I am going to give you below and think it is a good base to start from or enjoy as is. It yields a lemony but not tart, sweet but not sugary beverage to be enjoyed on a sunny afternoon...or over ice with a splash of vodka.
For those of you experiencing the throes of winter, tuck this away for springtime. If you are in my neck of the woods, shocked by 88 degree temps at the beginning of February, whip out some glasses and sip to the beginning of spring...err summer!
Fresh Lemonade
Yields: ~2 1/2 quarts
Ingredients:
2 cups freshly squeezed lemon juice
1 cup superfine sugar**
2 cups crushed ice
6 cups water
Directions:
Squeeze lemons. Pour through a fine-strainer to eliminate any remaining pulp and seeds. Place all ingredients in a blender and process until completely smooth. Unless you have a large blender, you will probably have to do a couple of batches. Put the first 3 ingredients in the blender and 2 cups of water, blend. Pour half of the contents into a pitcher. Add the remaining 4 cups of water, blend. Stir in with the lemonade in the pitcher.
**I have made this with 100% sugar as well as with a sugar substitute for a low-calorie version. I used the same amount of sugar/sugar substitute both times. However, since sugar substitute can be a little more potent, try reducing the sugar by 1/4 cup if you want to make sure the lemonade is not too sweet. You can always add more.
Magic Cookie Bars
1/26/2016
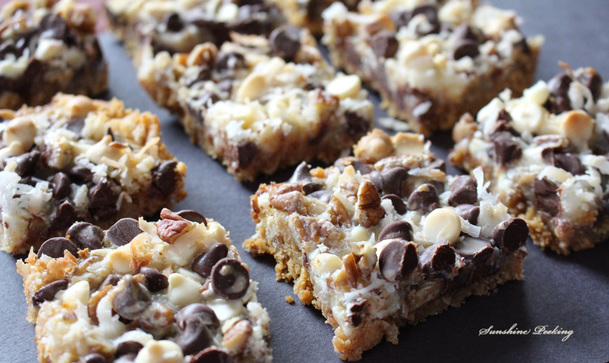
Tastē Tuesday~ As much baking as I have done, I have never made magic bars before (also know as as 7-layer bars, Hello Dollies, and Grizzly Bars). I wonder why they have so many names?! I saw a picture on the back of a graham cracker box and got the hankering to make them. I scoured the internet for the best recipe and was surprised to find that they were all basically the same with just a few variations in ingredients and one difference in methodology (where to place the sweetened condensed milk). I created my own way of putting the bars together, and will therefore call them Magic Bars as 7-layer bars aren't quite accurate. These are rich little treats, but quick and easy to make!
Magic Cookie Bars
Ingredients
1 1/2 cups graham cracker crumbs
1 stick salted butter, melted
1/2 cup chopped pecans
1 cup white chocolate chips (butterscotch chips or peanut butter chips are also an option)
1 cup semisweet chocolate chips
1 cup shredded coconut
1 (14 -ounce) can sweetened condensed milk
Directions
Preheat the oven to 350. Combine the graham cracker crumbs and melted butter in a bowl. Press into the bottom of a 9-by-13-inch baking dish. In a bowl, mix together the pecans, chocolate chips, and shredded coconut. Pour half of the sweetened condensed milk evenly over the graham cracker crust. Sprinkle the pecan, chocolate, coconut mixture on top. Drizzle the remaining sweetened condensed milk over the mixture and bake for 25 minutes or until coconut is just beginning to toast and the edges are turning golden. Cool completely and cut into bars.
I like mixing coconut with the other ingredients in order to ensure that the ingredients are evenly distributed across the entire 9x13. I also split the sweetened condensed milk whereas other recipes either poured it on after the crust and before the rest of the ingredients or on top of all of the ingredients. I used it as a binder to help the ingredients stick to the crust as well as each other. When you take a bite into these bars you won't lose any delicious toppings! If you have a variation to this recipe that is to die for, please share; I would love to try it.
Mascarpone Chocolate Toffee Bars
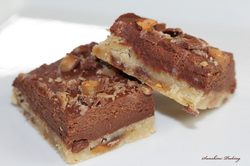
1/18/2016
Tastē Tuesday~ This is one of those recipes that is not necessarily my favorite dessert recipe but one that I make at least once a year due to one ingredient: mascarpone. I have another recipe that I make that calls for mascarpone, but only 4 ounces of it, which is half of any container I have ever found of mascarpone cheese. I am inevitably left with 4 oz, and being a person who doesn't like to throw perfectly good ingredients out, especially when they are of the more expensive variety, this is my go-to "use the rest of my mascarpone" recipe. That being said, a little bit of cookie dough, a few morsels of toffee bits, and a creamy, decadent chocolate topping makes for a pretty tasty treat I am forced to occasionally make in order to use some leftovers!
I have slowly altered the recipe after making it a couple of times. This past week, I altered it a lot which proved it to be a flexible recipe. Check out the notes section at the end for modifications/ideas. This is a great dessert to end an Italian meal with, to turn to for something fancier than your every-day brownie but just as easy, or if you have some left-over mascarpone cheese!
Mascarpone Chocolate Toffee Bars
Adapted from Giada De Laurentiis
Vegetable cooking spray
1/2 pound refrigerated sugar cookie dough (store-bought for ease or homemade if desired)
1 (1.4-ounces) chocolate-toffee candy bars, coarsely chopped, divided (Skor or Heath)
1/4 teaspoon pure vanilla extract
1/2 cup high quality semisweet chocolate chips
1/2 teaspoon vegetable oil
1/2 cup (4 ounces) mascarpone cheese, at room temperature
Position an oven rack in the middle of the oven. Preheat the oven to 350 degrees F.
Spray a 9 by 5-inch (or 8 x 4-inch) nonstick baking pan (your larger loaf pan) with vegetable cooking spray. Lay a piece of parchment paper in the pan, allowing the excess paper to overhang the sides. Spray the parchment paper lightly with cooking spray.
In a medium bowl, combine the cookie dough, 1/2 of the chopped chocolate-toffee candy pieces and vanilla extract. Using damp fingers, gently press the dough into the prepared pan. Using the tines of a fork, prick the dough all over. Bake for 12 to 14 minutes until the crust is lightly browned. Cool for 15 minutes.
Place the chocolate chips and vegetable oil in a medium bowl. Place the bowl over a pan of simmering water and stir until the chocolate has melted. Cool the chocolate mixture for 10 minutes. Whisk in the mascarpone cheese until the mixture is smooth. Using a spatula, spread the chocolate mixture over the cooled crust. Sprinkle the remaining chocolate-toffee candy pieces over the chocolate mixture. Refrigerate for at least 2 hours until the chocolate layer is firm.
Peel off the parchment paper and cut into bars. Can be served cold or at room temperature.
Notes:
1) Use a spoon to mix the cookie dough, toffee pieces, and vanilla. Damp fingers work great for pressing the dough into the pan, but the dough is too sticky to mix with your hands.
2) Making sure the cheese is at room temperature prior to whisking into the chocolate mixture is important!
3) This recipe can easily be doubled. If so desired, us a 9" round tart pan.
4) Last week I doubled the recipe thinking for some reason that I had 8 ounces of mascarpone cheese only to find out that I did not. I did have 4 ounces of cream cheese on hand, so I used 4 ounces of mascarpone and 4 ounces of 1/3 less fat cream cheese. The cream cheese added a slight tang to the chocolate but due to all of the other sweet ingredients, the end product was still good.
5) If you really like toffee, the recipe could easily be modified to use 1 1/2 or 2 (1.4 ounce) toffee bars.
6) The original recipe calls for toasted, sliced almonds. I have made it with the almonds, however, have chosen not to recently.
Present Cake
12/22/2015
Tastē Tuesday~ I enjoyed going caroling for the first time in my life this past Sunday. Before heading out to bring wishes for a Merry Christmas to the neighbors, I did not know if it would be awkward or fun...it was great! Our small neighborhood church went throughout a few of the streets around the church, and it was joyful to see the smiles on the faces of those we sung to. It was a fun glimpse into an old tradition that spread the joy of the season unexpectedly to those around us. Caroling was followed by a party, so I made a cake. It didn't turn out quite like I had hoped, but I did learn a few things (like the new bow technique I was hoping would be awesome...wasn't!), and the cake was completely devoured, so I guess it was a win-win.
With only 3 days left before Christmas, I hope the hustle and bustle is starting to slow down and the sacredness of the season is beginning to take center stage.
Easy Peppermint Bark
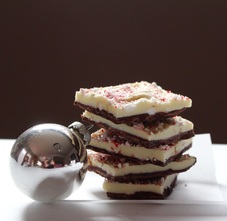
12/14/2015
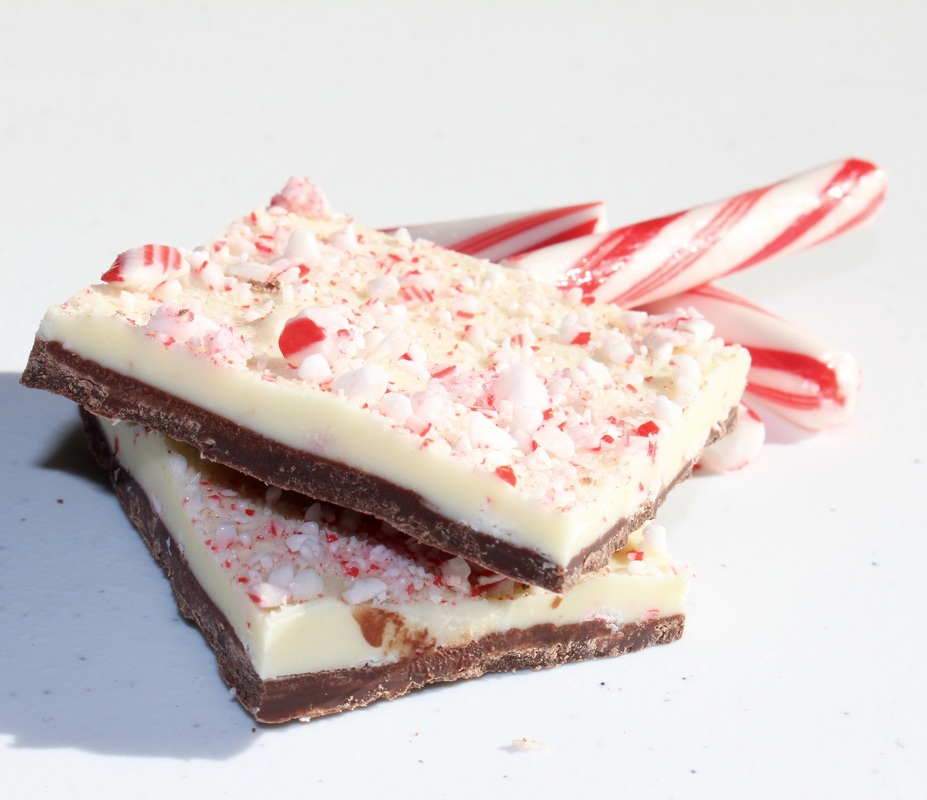
Tastē Tuesday~ I am a visual learner, and one thing I dislike in the world of cooking is staged food photography that shows something other than what the associated recipe yields. I have had a recipe for peppermint bark tucked away for a few years. It is a simple recipe with delicious looking pictures, so although peppermint bark is not one of our Christmas traditions, I knew I would have to try it one year.
This year was the year, and immediately two things caught my attention. First, the picture shows an equal amount of milk chocolate and white chocolate, but the recipe calls for two different amounts of chocolate. Second, The recipe says to line a pan with foil but the picture shows a beautiful square of bark cut out of a pan sans any foil anywhere. Not being a 100% confident cook, I decided to try the recipe with the chocolate amounts as written. Unfortunately, right when I poured the first layer into the pan, I knew I should have gone with my gut and used more milk chocolate...not that my gut is really complaining about the finished product though! I was really happy with how this peppermint bark turned out, and it was super easy. However, there are a few morsels remaining, and I do think the chocolate texture has changed over the course of the last couple of days (perhaps that is due to our climate or maybe it is the way I melted my chocolate (hence "easy" in the title versus carefully tempering it). I won't know until next Christmas!
I altered the recipe to reflect the amounts of chocolate I will use the next time I make it (so if you give this a try, unlike my pictures, yours brown and white chocolate should be equal). This easy candy treat is great for gifts or parties, but I do recommend consuming it within 3-4 days of making it to enjoy it at its peak freshness. As you can see by all of the *'s throughout the recipe, there are quite a few tips that will make this a successful candy-making endeavor.
Easy Peppermint Bark
1 pound high-quality semi-sweet chocolate*
1 pound white chocolate with cocoa butter*
1/2 teaspoon peppermint extract
1/2-2/3 cup crushed candy canes or peppermint candies*
Working in 2-3 batches, place candy canes or peppermint candies in mini-food processor and pulse into small pieces. Set aside. Line a 15x10" jelly roll pan with foil extended over the sides. Grease foil with a nonstick spray. Melt the chocolate chips in the microwave at 50% power, 20 seconds at a time, stirring each time. When the chips are almost melted but still holding some form, take out of the microwave and stir until smooth. (It is easy to burn chocolate in the microwave. To ensure smooth chocolate, make sure no water gets into the chocolate, and take your time melting it. You can also use a double-broiler if you don't mind more dishes.) Pour evenly into pan and smooth. Sprinkle with 1/4 cup peppermint candy. Place in refrigerator until firm.
Heat white chocolate in the same way as the milk chocolate. Once smooth, stir in peppermint extract. Pour over chocolate layer and spread quickly so it does not melt the first chocolate layer. Sprinkle with remaining crushed candy. Chill until both layers are firm. Lift foil out of pan and cut into squares of desired size.
*Tips*
1) You can use whatever milk chocolate you desire, from milk chocolate to dark chocolate. I read somewhere that dark chocolate has less issues with separating from the white chocolate, but I can't find where I read that and it is past my bedtime. Many recipes call for whichever chocolate you prefer so I think you can safely go with preference.
2) The white chocolate must contain cocoa butter in order to adhere to the milk/semi-sweet/dark chocolate. Check the ingredient list before tossing your white chocolate into your shopping basket.
3) I used my food processor. However, I did feel like I had more candy cane powder than I wanted. Larger chunks tend to be preferred for the topping, so two different suggestions:
* use a small mallet/hammer to crush your candy canes or
* use the food processor and put the smallest pieces/powder in the 1/4 cup used on top of the milk chocolate layer, saving the larger chunks for the top of the white chocolate.
Merry baking and candy making...only 10 days until Christmas!
Bodacious Banana Pudding
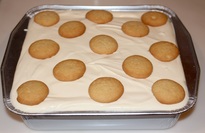
12/8/2015
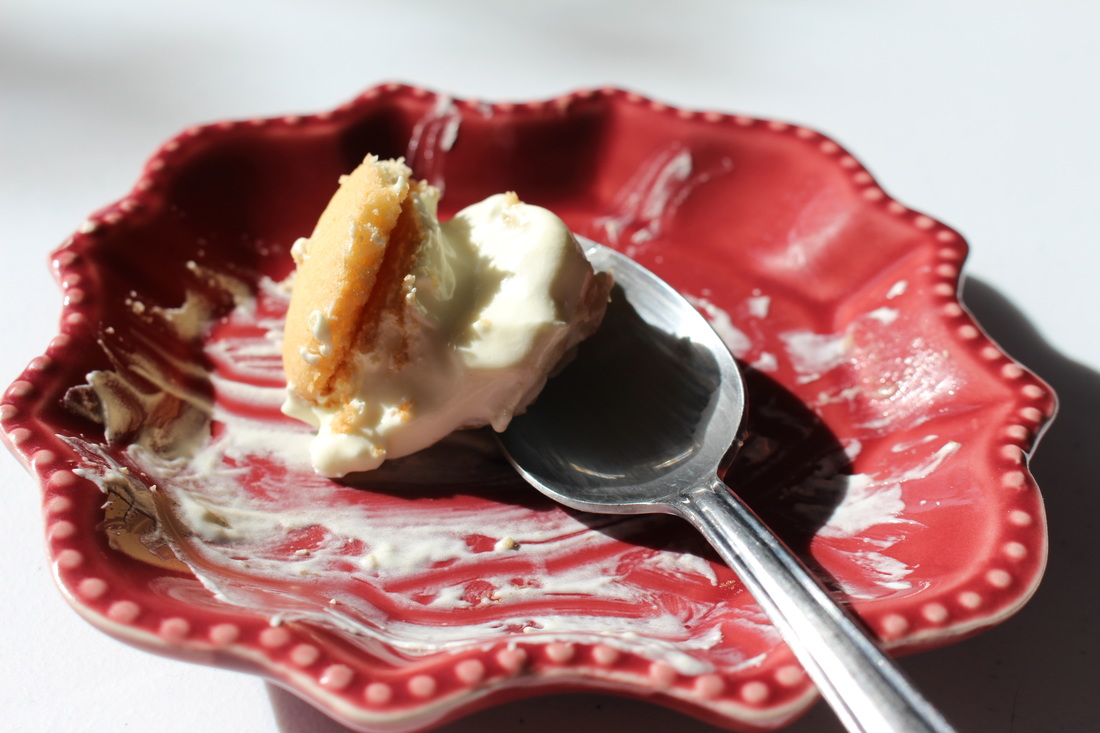
Tastē Tuesday~ There is a back story for why I made banana pudding, but alas there is no time to write it tonight. Let's just say...there will be more banana recipes in the near future. For now, I will keep it short and sweet, kind of like this recipe, super quick to make and totally delicious! I made this Sunday afternoon for the hubby to take into the office on Monday. When I tasted it Sunday night, because I thought we might need our own batch at home as well, I thought it was a keeper. That was confirmed when he returned home Monday afternoon with rave reviews and no leftovers. I adapted the recipe from Paula Dean, lightening it up a bit so I didn't feel too guilty when I consumed a quarter of the pan.
I hope everyone's week has gotten off to a wonderful start and that the merry and bright are shining over your holiday season!
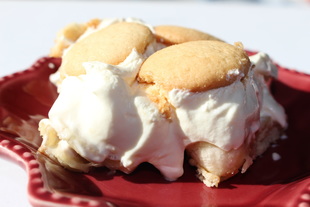
Bodacious Banana Pudding
Ingredients
1 (12 oz) box reduced fat Nilla wafers
6 to 8 bananas, sliced
2 cups skim milk
1 (5-ounce) box instant vanilla pudding
1 (8-ounce) package 1/3 less-fat cream cheese, softened
1 (14-ounce) can sweetened condensed milk
1 (12-ounce) container frozen whipped topping thawed
Directions
Line the bottom of a 13 by 9 by 2-inch dish with 1/2 box of cookies and layer bananas on top.
In a large bowl (because to will splatter!), combine the milk and pudding mix and blend well using a handheld electric mixer (follow package directions for approximate time; usually about 2 minutes). Using another bowl, combine the cream cheese and condensed milk together, mixing until smooth. Fold the whipped topping into the cream cheese mixture. Add the pudding to the cream cheese mixture and stir until well blended. Pour the mixture over the cookies and bananas and cover with the remaining cookies. Refrigerate until ready to serve.
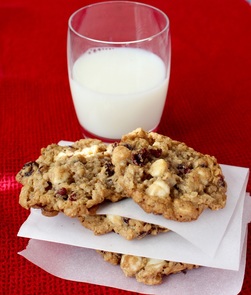
Tastē Tuesday~ A cross-country move affects the kitchen. Not only are there issues like altitude, humidity, new appliances, etc. but when you are addicted to a grocery store, like I was to Wegmans, finding a new store is almost worse than finding a new house. On occasion, instead of being frustrated by not being able to find the product or brand that is key to one of my recipes, I am surprised by a product I have never seen before. This pleasant experience happened at the beginning of autumn when cranberry "stuff" began flooding the shelves. In one of my favorite aisles, the baking aisle, I spotted a bag of baking cranberries next to all of the bags of chocolate chips. Although they are really nothing more than dried cranberries, they are julienne cut which is a yields a great size berry for muffins and cookies. I grabbed a bag to experiment with. The tasty cookies were a nice change from the traditional chocolate chip or sugar cookie and just as easy to make.
Cranberry White Chocolate Oatmeal Cookies
Yields~ 3 dozen cookies
3/4 stick Crisco All-Vegetable Shortening Baking Sticks
3/4 cup sugar
3/4 cup firmly packed light brown sugar
2 large eggs
2 teaspoons vanilla extract
1 cup flour
1 teaspoon baking soda
1 teaspoon ground cinnamon
1/4 teaspoon salt
2 3/4 cup rolled oats
3 1/2 ounces dried cranberries, julienne cut
6 ounces white chocolate chips
Heat oven to 375 degrees. Place a piece of parchment paper on a cooking sheet. Cream shortening, sugar and brown sugar. Add eggs and vanilla. In a small bowl, combine flour, baking soda, cinnamon and salt. Add flour mixture to sugar mixture and combine. Stir in oats, cranberries, and white chocolate. Drop rounded tablespoons on baking sheet. Bake 10 to 12 minutes or until light brown. Cool on baking sheet for 2 minutes or until cookie retains shape when transferred to cooling rack.
Spicy Bison Chili
11/23/2015
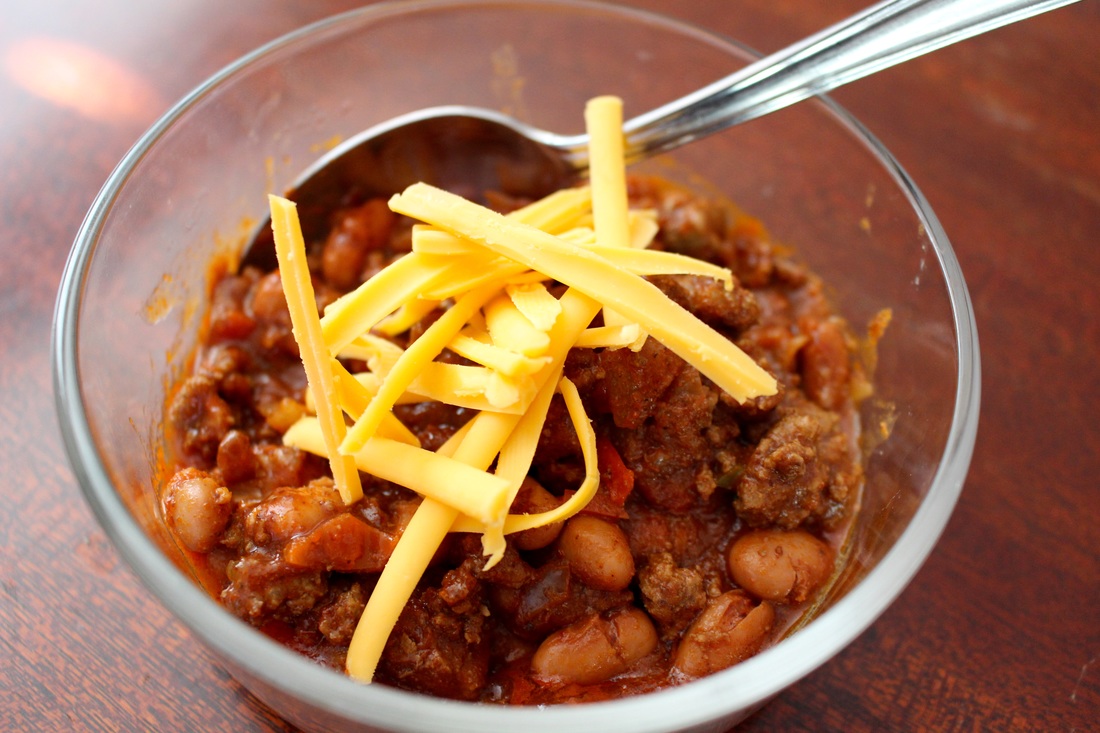
Tastē Tuesday~ Do you ever find yourself in the conundrum of wanting to eat healthy but fearing that those healthy recipes you have will not taste good so they just sit in a drawer some where waiting to be made? Here is one you can definitely give a try. Perfect for a game-day meal or just a super easy weeknight meal on a chilly day, this chili is flavorful and healthy - that is a winning combination. I first made it a few weeks ago for a church potluck. We were celebrating missions and supposed to bring a meal that reflected our heritage. I don't do a lot of German or French cooking, and I have a tiny bit of Native American in me, so bison chili was my recipe of choice. The slow-cooker was empty! The hubby had a chili cook-off last week, so I made it again. Once again, the slow-cooker was empty, and it won the blue ribbon. Now, I need to make a batch to enjoy at home so I get more than a mere spoonful!
If you have never tried bison or are wondering why not just use ground beef (which you could do if you can't find bison), here is some interesting nutritional information. A serving of bison is similar in calories to turkey and chicken. Compared with beef, pork, turkey and chicken, bison has the most protein and the least amount of fat and cholesterol. If you want the specifics, check out this link: http://www.bisonbasics.com/nutrition/nutrition_comparison2.html. If you are looking for a beef alternative, bison is a great one to consider, and thankfully it is fairly easy to find in most grocery stores these days.
Since it is Thanksgiving week, even if you don't usually find yourself in the kitchen, you probably will this week...happy cooking!
Spicy Buffalo Chili
Serves: 5
1/4 chili powder
1/2 tablespoon ground cumin
1/4 teaspoon ground chipotle pepper
1/4 teaspoon cayenne pepper
1/8 teaspoon cinnamon
1/2 tablespoon vegetable oil
2 pounds ground bison
1/2 large white onion, chopped
1 clove garlic, minced
1 jalapeno, seeded and diced
1/2 red bell pepper, diced
1 (14 ounce) can tomato puree
1 1/4 cup low sodium beef broth
3/4 teaspoon salt
1/4 teaspoon freshly ground black pepper
1 (15 ounce) can pinto beans, rinsed and drained
5 ounces shredded sharp cheddar
1. Add the spices to a small pan and toast over medium-low heat for 2 minutes. Set aside.
2. Heat a large pot over medium-high. Add vegetable oil and bison and brown for 5 minutes. Stir in onion and sauté for 5 minutes. Add garlic and cook for 1 minute. Mix in spices, diced jalapeño, bell pepper, tomato puree, beef broth, salt, and pepper and bring to a boil. Reduce heat to low and simmer for 1 hour, stirring occasionally. Add additional beef broth for thinner chili.
3. Mix in pinto beans and cook for 15 minutes. Divide chili among 5 bowls and top each with 1 ounce shredded cheddar.
If you are making this for a potluck or party, once the the chili is brought to a boil on the stove, transfer it to a slow cooker and continue to follow the recipe. Once the pinto beans have been mixed in, the temperature can be changed to "keep warm." This can also be made the night before. Simmer on the stove for an hour. Transfer to a slow cooker and stir in the pinto beans then refrigerate. The next morning a couple of hours prior to serving, plug in the slow cooker on high until mixture is heated through, then lower to keep warm.
*Just for reading this far, here is an additional tidbit. Bison and buffalo are not actually the same species. Our predecessors called the North American Bison buffalo due to the similar appearance with buffalo found across the Atlantic Ocean. However, buffalo that live here in American are North American Bison and the two primary types of buffalo live in Africa and Asia.
Walnut Spice Cake
11/17/2015
Tastē Tuesday~ Hosting a dinner for my husband's team from work over the weekend gave me a great excuse to bake a cake. Since we can't consume an entire cake ourselves, and when I make cake for special events they typically are white or chocolate, I rarely have the opportunity to play with other flavors. I have had my eye on this cake for awhile, and since it is fall, I seized my chance to spend some time in the kitchen. It was easy to put together, and the walnuts added a fun, simple and unique garnish/decoration. I added some helpful hints at the bottom of the recipe that I learned while making, eating, and storing the cake. This cake would be a yummy treat to add to a football game spread or fall dinner shared with friends and family.
Walnut Spice Cake
Adapted from Parents Magazine
Servings: 20 Prep 25 mins Bake 350°F 35 mins
Cake:
Frosting:
1. Heat oven to 350 F. Prepare two 9-inch cake pans with shortening and flour (you can also spray the pan with cooking spray, line bottom with parchment or waxed paper and spray again - will save you a few calories but takes more time).
2. In bowl, whisk flour, baking soda, cloves, cinnamon, nutmeg and salt. Set aside.
3. In a second bowl, beat together both sugars and shortening until combined. Beat in eggs, one at a time, beating well after each addition. Beat in the dry ingredients in three additions, alternating with the buttermilk. Beat 2 minutes.
4. Divide batter between prepared pans. Bake at 350 F for 30 minutes, or until toothpick inserted in center comes out clean. Cool in pans on wire rack 10 minutes. Turn cake layers out and cool completely on a cooling rack lightly sprayed with cooking spray.
5. In bowl, beat shortening, butter and extracts. Gradually beat in powdered sugar then 1/4 cup of milk; beat until smooth, adding more milk as needed for good spreading consistency.
6. Place 1 layer on serving plate. Spread with 1 cup of frosting. Place second layer on top. Frost top and sides of cake. Gently press chopped nuts onto sides.
Helpful Hints:
1. This dough is sticky; so whichever method you choose to prepare your plan, prepare your pan well.
2. The frosting will start out very thick. Add milk slowly, starting with ¼ cup until desired consistency is reached. The thinner it is, the easier it will be to frost the cake without picking up too many crumbs from the cake. However, if it is too thin, it won’t provide enough coverage and the walnuts will not stick.
3. I only used 1 1/2 cups of walnuts. They did not cover the entire side of the cake. I adjusted the recipe for 2 cups in order to cover the sides from top to bottom.
4. When adding walnuts, put a small amount in your hand and gently press onto the side of the cake. Immediately after your walnuts are in place, put the cake in the refrigerator. This will keep the walnuts in place, slightly hardening the frosting so everything doesn’t end up sliding down to your cake platter.
5. Pull the cake out of the refrigerator 15-20 minutes prior to serving. Cake (in general) is best eaten at room temperature. Due to the milk in the frosting, it is safer to store leftovers in the refrigerator.
6. The frosting is very sweet since it has both powdered sugar and maple extract. I did not use all of the frosting, and there was plenty on the cake. Balance the sweetness with a warm cup of tea or cider or a tall glass of cold milk!
Tastē Tuesday~ Hosting a dinner for my husband's team from work over the weekend gave me a great excuse to bake a cake. Since we can't consume an entire cake ourselves, and when I make cake for special events they typically are white or chocolate, I rarely have the opportunity to play with other flavors. I have had my eye on this cake for awhile, and since it is fall, I seized my chance to spend some time in the kitchen. It was easy to put together, and the walnuts added a fun, simple and unique garnish/decoration. I added some helpful hints at the bottom of the recipe that I learned while making, eating, and storing the cake. This cake would be a yummy treat to add to a football game spread or fall dinner shared with friends and family.
Walnut Spice Cake
Adapted from Parents Magazine
Servings: 20 Prep 25 mins Bake 350°F 35 mins
Cake:
- 2 1/2 cups all-purpose flour
- 1 teaspoon baking soda
- 1/2 teaspoon ground cloves
- 1 teaspoon ground cinnamon
- 3/4 teaspoon ground nutmeg
- 3/4 teaspoon salt
- 1 cup granulated sugar
- 1 cup packed light-brown sugar
- 3/4 cup solid vegetable shortening
- 3 eggs
- 1 1/4 cups buttermilk
Frosting:
- 1/2 cup solid vegetable shortening
- 1/2 cup (1 stick) unsalted butter, at room temperature
- 1 teaspoon maple extract
- 1/2 teaspoon rum extract
- 2 lbs powdered sugar
- 1/2 cup+ milk
- 2 cups walnuts, toasted, coarsely chopped
1. Heat oven to 350 F. Prepare two 9-inch cake pans with shortening and flour (you can also spray the pan with cooking spray, line bottom with parchment or waxed paper and spray again - will save you a few calories but takes more time).
2. In bowl, whisk flour, baking soda, cloves, cinnamon, nutmeg and salt. Set aside.
3. In a second bowl, beat together both sugars and shortening until combined. Beat in eggs, one at a time, beating well after each addition. Beat in the dry ingredients in three additions, alternating with the buttermilk. Beat 2 minutes.
4. Divide batter between prepared pans. Bake at 350 F for 30 minutes, or until toothpick inserted in center comes out clean. Cool in pans on wire rack 10 minutes. Turn cake layers out and cool completely on a cooling rack lightly sprayed with cooking spray.
5. In bowl, beat shortening, butter and extracts. Gradually beat in powdered sugar then 1/4 cup of milk; beat until smooth, adding more milk as needed for good spreading consistency.
6. Place 1 layer on serving plate. Spread with 1 cup of frosting. Place second layer on top. Frost top and sides of cake. Gently press chopped nuts onto sides.
Helpful Hints:
1. This dough is sticky; so whichever method you choose to prepare your plan, prepare your pan well.
2. The frosting will start out very thick. Add milk slowly, starting with ¼ cup until desired consistency is reached. The thinner it is, the easier it will be to frost the cake without picking up too many crumbs from the cake. However, if it is too thin, it won’t provide enough coverage and the walnuts will not stick.
3. I only used 1 1/2 cups of walnuts. They did not cover the entire side of the cake. I adjusted the recipe for 2 cups in order to cover the sides from top to bottom.
4. When adding walnuts, put a small amount in your hand and gently press onto the side of the cake. Immediately after your walnuts are in place, put the cake in the refrigerator. This will keep the walnuts in place, slightly hardening the frosting so everything doesn’t end up sliding down to your cake platter.
5. Pull the cake out of the refrigerator 15-20 minutes prior to serving. Cake (in general) is best eaten at room temperature. Due to the milk in the frosting, it is safer to store leftovers in the refrigerator.
6. The frosting is very sweet since it has both powdered sugar and maple extract. I did not use all of the frosting, and there was plenty on the cake. Balance the sweetness with a warm cup of tea or cider or a tall glass of cold milk!
BLACKBERRY GRILLED CHEESE SANDWICHES
11/10/2015
Tastē Tuesday~ Grilled cheese sandwiches are not a staple in our house, but every now and again, especially when I am looking for an easy weekend lunch, they make the menu. Last week I changed it up a bit and opted to play with a different flavor combination. We thought it turned out delish! Adding fruit to melted cheese makes it healthier right?
Tastē Tuesday~ Grilled cheese sandwiches are not a staple in our house, but every now and again, especially when I am looking for an easy weekend lunch, they make the menu. Last week I changed it up a bit and opted to play with a different flavor combination. We thought it turned out delish! Adding fruit to melted cheese makes it healthier right?
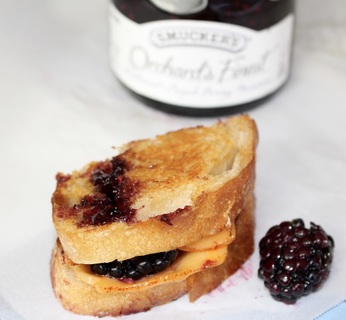
BLACKBERRY GRILLED CHEESE SANDWICHES
Makes 4 sandwiches
8 slices sourdough bread
light butter, softened
4 slices chipotle gouda*
12-15 Blackberries, depending on the size of your bread
Triple Berry Jam*
Begin heating a skillet over medium heat. Spread butter on one side of each of the slices of bread. On the other side of 4 of the slices, spread jam. Top with blackberries, slightly smushed between your fingers. On the other 4 slices of bread, place a slice of gouda cheese. Put the sandwiches together so that the buttered sides face outward. Place in the heated skillet, gently pressing each of them down with a spatula. When the bread turns golden brown and the cheese begins to melt, flip and brown the opposite side. Serve warm and enjoy the juxtaposition between the sweet berry and the spicy cheese.
*Found at the deli counter. Ours is Boar's Head - hopefully your deli sells something similar. If not, a pepper jack or jalapeño cheese could be substituted.
**This ingredient ia very flexible. Any pure blackberry or mixed berry jam would work well.
PUmpkin BreaD X2
11/5/2015
Tastē Thursday~ I don’t follow many blogs (so thank you for reading mine!) because I frequently find the picturesque fashion, organization, cooking…all week every week unattainable and therefore unrealistic. Who needs that kind of pressure?! When I was 8 months pregnant with #3 I was perusing a photographic journey of a woman who had made cookies and brought them to the nursing staff at the hospital when she delivered her first child. When 9 months rolled around, I actually considered putting my apron on and making cookies thinking who doesn’t like a cookie to nibble on at 2 am (I always have my babies in the wee hours of the morning) and perhaps I would be treated with more consideration if I arrived bearing snacks. However, logic quickly settled in. I decided the delivery team, whose lives would intersect with mine for 10 hours out of their and my entire lives, wouldn’t care if I brought them food, and my true motivation was to try to match the image of this perfect woman (who probably isn’t all that perfect). So…lest you ever get the impression that I am always put together and have things (read anything) under control...the following was my mishap with pumpkin bread last week. Although I don’t frequently run into the particular accident that led to my baking experiment, every week brings multiple moments of quiet and, at times quite loud, imperfections. Onto the food…
Ever since my first bite of Starbucks pumpkin bread, I have been in love with the moist and perfectly spiced slice of autumn heaven. I have tried numerous recipes in search of recreating the wonderful little loaf at home. Last week brought another attempt, except I forgot one key ingredient…baking soda. I put the loaves in the oven, put the baby to bed, and began the older two boys’ bedtime routine. Before story time I peeked into the oven and thought my loaves looked odd and quite raw. Eventually, the bread tested done but still appeared to be a weird little brick. After pausing a few moments to think, which I should have done prior to ever opening the oven in the first place, I recalled that I had not put in any baking soda or powder. A quick review of the recipe assured me that this was my error. The next morning I cut a slice – just because the dough didn’t rise didn’t mean the flavor wouldn’t be the same right? It was edible, kind of, but there was absolutely no way three loaves of oddly textured pumpkin nuggets were going to be consumed. I wrapped them up and stuck them in the refrigerator hoping there would be a use for them but not certain what that was yet.
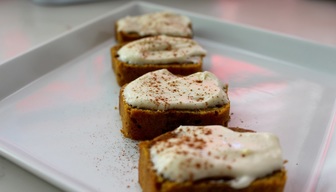
Saturday as I was prepping lunch for a meeting on Sunday afternoon I found their purpose. Slicing the loaves and laying them on a baking sheet, I cooked them again for about 20 minutes. I whipped up a small amount of cream cheese frosting, and after they cooled, frosted them and sprinkled some cinnamon on top. Voila, dessert! I can’t say they were awesome or even wonderful, but at least the food didn’t go to waste.
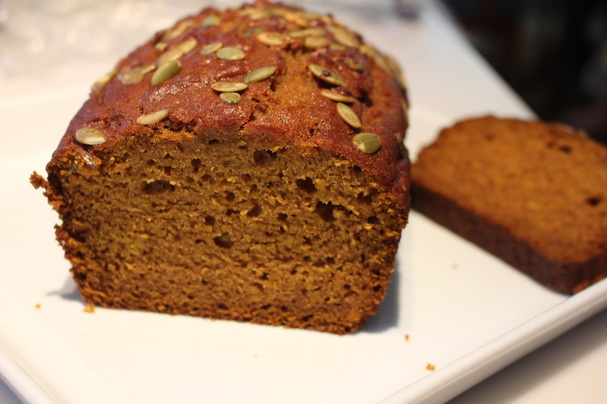 This is more like it!
I still had the recipe to try out with all of its ingredients mixed in, so Monday afternoon I tried again. I don’t think I will settle for this recipe being the final pumpkin bread recipe I ever try, but it is the best to date. It is moist and contains what I think might be the secret ingredient to good pumpkin bread…ground cardamom.
I am done with my pumpkin bread experiments until next fall when a cool breeze through the kitchen reignites my desire to continue my quest for the ultimate recipe. In the meantime, if you have company coming for Thanksgiving, I’m sure they would enjoy a slice of pumpkin bread in the morning…or if you have pumpkin left over from a pumpkin pie, this only requires a cup and is the perfect way to finish off a can of puree.
Pumpkin Bread
Makes 1 (8.5x4.5x2.5”) loaf
Ingredients:
1 ½ cups flour
1 cup sugar
¾ teaspoon salt
½ heaping teaspoon nutmeg
½ teaspoon cardamom
½ teaspoon cinnamon
¼ teaspoon allspice
14 teaspoon ground cloves
2 eggs, beaten
1 cup pumpkin puree
½ cup vegetable oil
½ teaspoon vanilla
1/3 cup pumpkin seeds
Instructions
Preheat oven to 350 degree. In a large bowl whisk together the dry ingredients; flour, sugar, salt, baking soda, salt, and spices. In a smaller bowl, mix together the 2 beaten eggs, oil, pumpkin puree, and vanilla. Once the liquid ingredients are mixed well, pour them over the dry ingredients. Stir until the lumps are out but do not over-stir the mixture. Pour into a loaf pan coated with cooking spray. Sprinkle pumpkin seeds on top of bread. Bake for 50-60 minutes, until a toothpick comes out clean when poked in the center of the loaf. Cool for 10 minutes in the pan, and then turn the pumpkin bread onto a cooling rack.
Cut bread after allowed to cool completely.
LOADED TWICE-BAKED POTATOES 10/27/2015
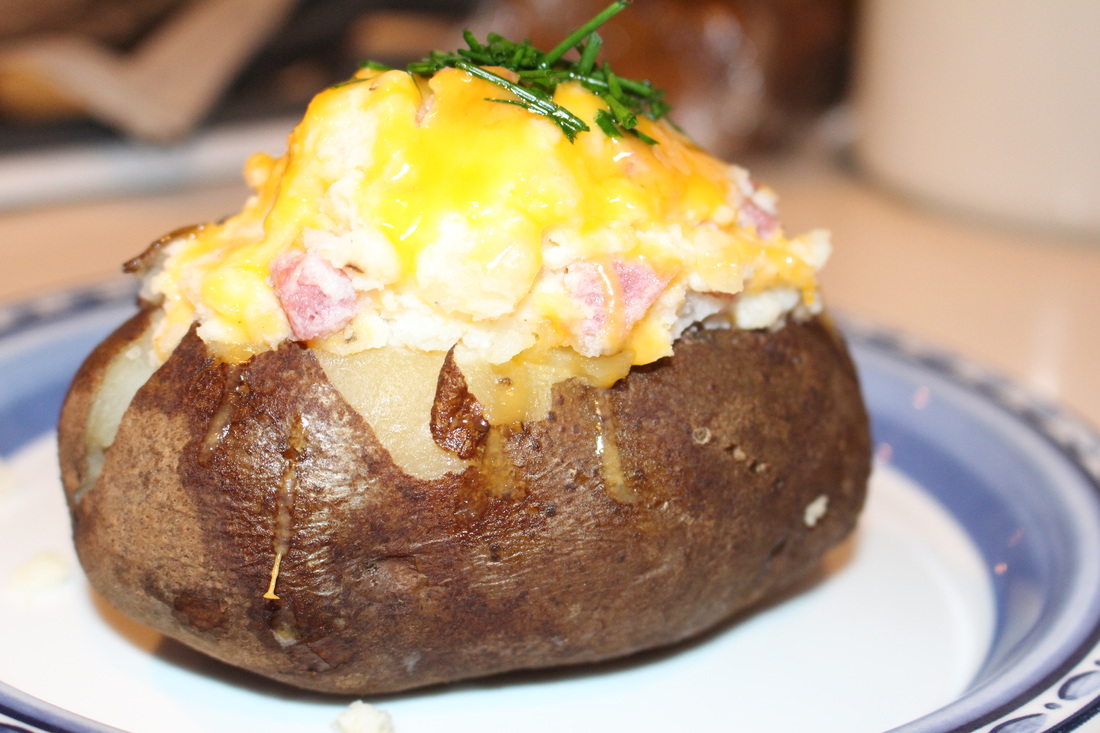
Tastē Tuesday~ I love the slow cooker...or at least the thought of the slow cooker. Unfortunately, I don't have a ton of recipes that I really enjoy. Usually the house smells delicious, I can't wait to sit down to eat, and then the first bite disappoints me. Every once in awhile though, I find a recipe to tuck away. This loaded baked potato is one of them. It isn't extremely fancy, but it is easy and filling. The recipe is easily adapted to personal tastes and preferences. I added salami because I had some that I needed to use, and I was making this for dinner and wanted the protein substance. However, you could make it without meat, split it in half, and use it for a side dish.
Loaded Twice-Baked Potatoes
Adapted from Cooking Light, September 2012
2 baking potatoes
cooking spray
1/8 teaspoon kosher salt
1/4 cup fat-free milk
1/4 cup plain fat-free Greek yogurt
2 ounces shredded reduced-fat sharp cheddar cheese (about 1/2 cup), divided
1/4 teaspoon kosher salt
1/4 teaspoon freshly ground black pepper
1 tablespoon chopped fresh chives
1 slice salami, 1/2" thick, chopped into small pieces
Scrub potatoes; rinse and pat dry with paper towels. Coat potatoes with cooking spray; pierce potatoes with a fork multiple times. Rub 1/8 teaspoon kosher salt evenly over potatoes; place in an oval 6-quart electric slow cooker. Cover and cook on LOW for 6-8 hours or until potatoes are tender. Cool slightly.
Cut a slit in each potato; gently squeezing both ends of the potato to open it up (maintain integrity of the potato). Carefully scoop out pulp into a bowl, leaving a 1/8-inch-thick shell. Mash pulp with a potato masher. Stir in milk, yogurt, 1/4 cup cheese, salami, 1/4 teaspoon kosher salt, and pepper. *Add additional milk and yogurt if potato is larger and you want a creamier filling.
Spoon potato mixture evenly into shells; sprinkle evenly with remaining 1/4 cup cheese. Arrange potato halves in bottom of slow cooker. Cover and cook on HIGH for 25 minutes or until thoroughly heated and cheese melts. Sprinkle each potato half with about 1/2 teaspoon chives.
Thank you for reading! Are you following me on Bloglovin'? Subscribe with the link at the top right of the page to have each post delivered straight to your e-mail box.
SALTED PUMPKIN CARAMEL THUMBPRINTS 10/20/2015
Tastē Tuesday~ With cooler evenings and crisper mornings, fall is in the air. With fall come the tastes and flavors of the season, and the not-so-stifling heat means the oven can be turned back on and the baking can begin! A visit from my sister and her family a couple of weeks ago gave me an excuse to make dessert, and I thought since it was the first weekend in October, a hint of pumpkin would get the month off to a great start.
With a little pumpkin pie in each bite and a complex ending due to a sprinkle of fleur de sel, each little cookies is a pleasant reminder of the holidays to come.
With a little pumpkin pie in each bite and a complex ending due to a sprinkle of fleur de sel, each little cookies is a pleasant reminder of the holidays to come.
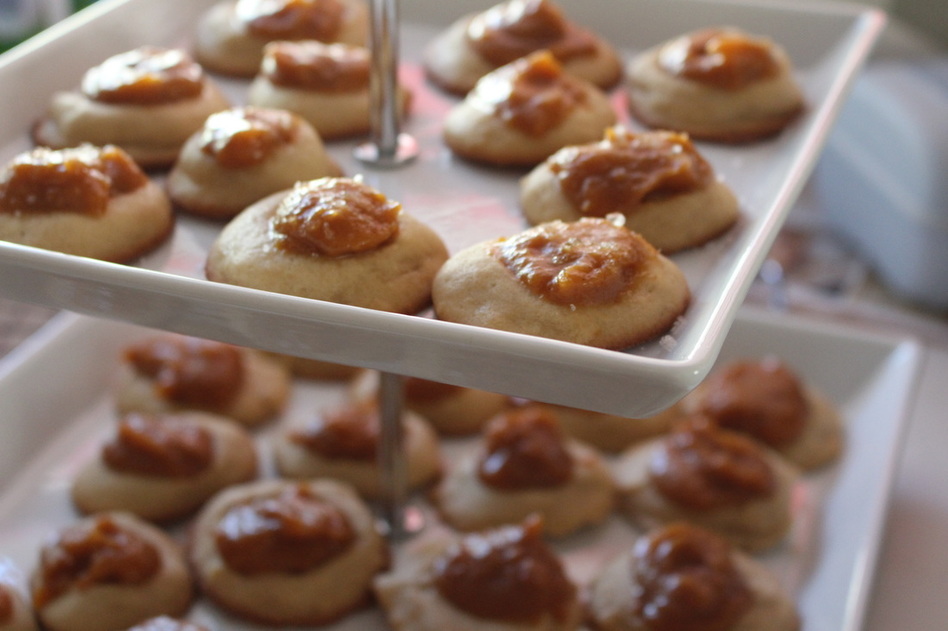
Salted Pumpkin Caramel Thumbprints
Recipe adapted from Joy Wilson of Joy the Baker
Ingredients
2/3 cup unsalted butter, softened
1/2 cup packed light brown sugar
1/4 teaspoon salt
1 egg
1 teaspoon vanilla
1 1/2 cups all-purpose flour
1/2 cup granulated sugar
2 tablespoons water
2 tablespoons light-color corn syrup
1/3 cup whipping cream
2 tablespoons unsalted butter
3/4 teaspoon cinnamon
1/4 teaspoon ground nutmeg
1/8 teaspoon ground cloves
1/8 teaspoon ground ginger
1/2 cup canned pumpkin
Fleur de sel
Directions:
Thumbprints: in a large mixing bowl beat 2/3 cup butter with an electric mixer on medium to high speed for 30 seconds. Add brown sugar and 1/4 teaspoon salt. Beat until combined, scraping sides of bowl occasionally. Beat in egg and vanilla until combined. Beat in flour. Cover and chill dough about 1 hour or until easy to handle.
Preheat oven to 375 degrees F. Roll dough into 1-inch balls. Place 2 inches apart on ungreased cookie sheets. Press thumb, or a measuring spoon coated in cooking spray, into the center of each ball. Bake for 8 to 10 minutes or until bottoms are lightly browned. If cookie centers puff during baking, repress with the back of the spoon. Remove and cool on a wire rack.
Salted Pumpkin Caramel: place granulated sugar, water, and corn syrup in a medium saucepan. Bring to boiling over medium heat, swirling the pan to stir. Boil gently, uncovered, until browned. Once sugar has browned to a medium amber color, cook for an additional 5 to 8 minutes, then remove from heat. Immediately add cream and 2 tablespoons butter. Mixture will boil and foam. Stir well. Add the spices and pumpkin and stir well to incorporate. (Caramel may seem thin-that's OK.) Place in a bowl. Cover and chill at least 4 hours. Spoon into cooled cookies; sprinkle with flour de sel.
*Notes: It will take awhile (at least 5-10 minutes) for the sugar mixture to turn amber. Then you continue to cooke the mixture for another 5 minutes. If you don't let the caramelization fully take place, the pumpkin taste will be a bit stronger. I did not cook my caramel as long as I should have. I am looking forward to making them again and pulling the nuance of the caramel flavor out more in the cookie.
BABY DEDICATION CAKE
Tastē Tuesday~ On Sunday we dedicated baby boy #3 to God. Three little girls were also dedicated, so one of the moms coordinated a nice luncheon at a local restaurant after the church service. I thought it was a grand opportunity to get back into making cakes. I chose a simple but elegant design to accommodate both genders and to avoid a meltdown by both me and the cake since our house was 89 degrees on Saturday! I was happy the first cake in a new climate went well, and it was a new experience to have one of my cakes taken back to the kitchen and professionally cut and served.
Pork Tenderloin Melt
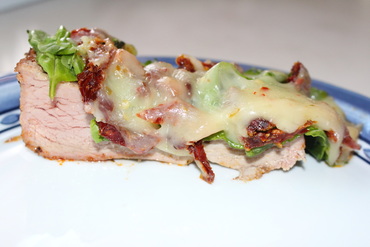
Tastē Tuesday~ A go-to favorite, the following recipe is easy enough for a weeknight meal but tasty enough for casual company. With fresh spinach and sun dried tomatoes, it is great for a summer evening. Similarly, melted cheese and the oven preparation lends a cozy, winter feel.
As usual, I have put my own little twist on the original recipe. The idea is basic and could be modified in many ways...I just thought of one I'll have to try! If you change it up and discover a scrumptious flavor combination, come back and let me know. In the meantime, as the nights get a little crisper but the taste for summer has not yet gone away, consider trying this warm yet fresh pork dish.
Pork Tenderloin Melt
2-3 Servings
1 (1 lb) pork tenderloin
olive oil
Cajun rub (recipe to follow)
1 cup fresh spinach leaves
1/2 cup julienne cut sun-dried tomatoes
1 cup shredded Monterey jack cheese
Preheat oven to 325 degrees F.
Baste the tenderloin in olive oil and generously rub with desired amount of Cajun rub. Bake for 20 to 30 minutes, depending on the thickness of your tenderloin. You want the tenderloin almost cooked through. In order to keep the pork moist and not overcooked, remove when the internal temperature reaches about 135 degrees Remove the tenderloin from oven and butterfly. Layer spinach, sun-dried tomatoes and shredded Monterey jack cheese. Put tenderloin back in the oven open face. Cook until 145 degrees F. Rest 3 minutes, slice and serve.
**This dish easily feeds more people if you buy a larger pork tenderloin. Adjust topping amounts for your desired taste!
Cajun Rub
2 teaspoon salt
3/4 teaspoon dried thyme
1 teaspoon dried oregano
1 teaspoon cayenne pepper
1 teaspoon smoked paprika
1 teaspoon ground black pepper
1 teaspoon crushed fennel seeds
PEACH BRUSCHETTA WITH RICOTTA AND PROSCIUTTO
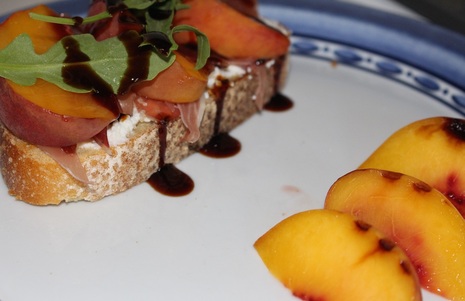
Tastē Tuesday~ I go to the store in the early summer months anticipating the first time peaches are in abundance and some are tender to the touch, not completely hard like out of season peaches shipped in from some other country tend to be. I dread the day in early fall when I go for my weekly grocery shopping trip and find that the large barrels of juicy peaches have been replaced by overflowing bins of apples. If I am lucky, a small box of peaches remains in the corner, and I know this will be my last opportunity to get in-season peaches until the weather begins to heat up again in about 8 months. This unfortunate shopping trip occurred this week, and since I opened up peach season with a recipe, I figured I would close the season with another recipe. Peach season was especially tasty this year. It seemed like all but one or two peaches I bit into were wonderfully tasty and juicy. However, feeling like I missed out on the opportunity to "play" with my peaches a bit more, or at least enjoy them more often, due to our big move, I am already looking forward to their return!
In the meantime, if a few peaches remain in your neck of the woods or if you want to experiment with jarred or canned peaches, below is a recipe that is perfect for the crisper evenings that will soon lend themselves to fall's bountiful harvest. Grilling the peaches brings out a completely different flavor and texture than eating fresh peaches. If you have never tried them, this more savory recipe is a quick and easy way to find out which you prefer! Paired with a salad, this simple recipe is enough for a meal, and since it can be put together in less than 30 minutes, it is a perfect meal to make a mid-week meal a bit more gourmet.
Peach Bruschetta with Ricotta and Prosciutto
adapted from Williams Sonoma Kitchen
Ingredients:
Working in 2 batches, arrange the peach slices on the panini press, close the lid and cook until the peaches are nicely marked on both sides, about 2 minutes.
Spread 1 1/2 Tbs. cheese on each bread slice. Drape the prosciutto on top, dividing evenly, and top with the peach slices. Put the arugula in a small bowl and lightly drizzle with olive oil. Top the bruschetta with the arugula. Drizzle with the balsamic vinegar glaze and sprinkle with course sea salt. Serve immediately. Serves 3-4.
*Notes:
The more even you can slice your peaches, the prettier your grill marks will be and the more even the cooking will be.
Balsamic glaze is becoming easier to find in most grocery stores. Look for it near either the balsamic vinegar or in the "Italian" aisle.
In the meantime, if a few peaches remain in your neck of the woods or if you want to experiment with jarred or canned peaches, below is a recipe that is perfect for the crisper evenings that will soon lend themselves to fall's bountiful harvest. Grilling the peaches brings out a completely different flavor and texture than eating fresh peaches. If you have never tried them, this more savory recipe is a quick and easy way to find out which you prefer! Paired with a salad, this simple recipe is enough for a meal, and since it can be put together in less than 30 minutes, it is a perfect meal to make a mid-week meal a bit more gourmet.
Peach Bruschetta with Ricotta and Prosciutto
adapted from Williams Sonoma Kitchen
Ingredients:
- 1/3 cup balsamic vinegar glaze
- 4 slices country-style bread, each about 1/2 inch thick
- Olive Oil Cooking Spray
- Olive oil for drizzling
- 2 large peaches, pitted and each cut into 6-8 slices
- 6 Tbs. ricotta cheese, lightly seasoned with kosher salt and ground white pepper
- 3 oz. thinly sliced prosciutto, with the fat trimmed off
- 1 1/2 oz. arugula
- Course sea salt for sprinkling
Working in 2 batches, arrange the peach slices on the panini press, close the lid and cook until the peaches are nicely marked on both sides, about 2 minutes.
Spread 1 1/2 Tbs. cheese on each bread slice. Drape the prosciutto on top, dividing evenly, and top with the peach slices. Put the arugula in a small bowl and lightly drizzle with olive oil. Top the bruschetta with the arugula. Drizzle with the balsamic vinegar glaze and sprinkle with course sea salt. Serve immediately. Serves 3-4.
*Notes:
The more even you can slice your peaches, the prettier your grill marks will be and the more even the cooking will be.
Balsamic glaze is becoming easier to find in most grocery stores. Look for it near either the balsamic vinegar or in the "Italian" aisle.
CHIPOTLE CHEESEBURGER
Tastē Tuesday~ It has not been a very savory summer. With the moving truck arriving in less than three days, our lunches and dinners for the better part of the last two months have been defrosted leftovers. Two truths: 1) with a newborn and a move, no one is complaining about all of the easy, and for the most part tasty, meals 2) I never realized how full my freezer was...my Tupperware drawer now runneth over and will be an organizing project upon arrival in our new house (kind of a bummer because I was pretty happy with how organized it was a mere two months ago!).
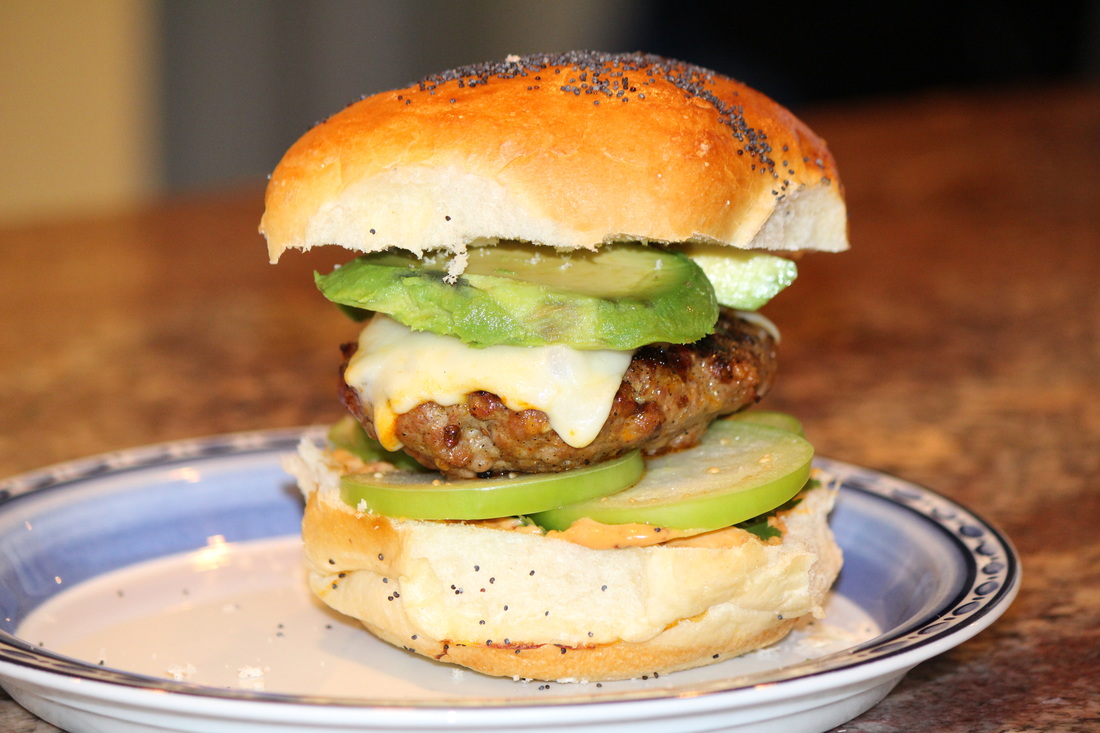
Our typical summer fare has been replaced by more wintry dishes like chilies and soups which has seemed odd on more than one 90 degree day. However, we have squeezed some tasty morsels into our diet here and there, and the Chipotle Cheeseburger is one of them. Changing the traditional burger up a bit, this moist pork patty is complemented by a crunchy slice of tomatillo, a splash of spice from adobo sauce and chipotle pepper, and a creamy slice of avocado. Doesn't get much better on a beautiful summer evening.
Chipotle Pork Cheeseburgers
Adapted from Gourmet, June 2009
1 pound ground pork
2 teaspoons minced chipotle in adobo sauce plus 2 teaspoons adobo sauce, separated
2 garlic cloves
4 slices Muenster cheese
4 hamburger buns, toasted
1/4 cup Olive Oil Mayonnaise
1 large tomatillo (1/4 pound), husked, rinsed, and sliced
1/2 avocado, sliced
1/2 cup cilantro leaves
Prepare a gas grill for direct-heat cooking over medium heat.
Gently mix pork, chipotle and 1 teaspoon sauce, garlic, and a scant teaspoon salt until just combined. Form in 4 (1/2" thick) patties.
Oil grill rack, then grill patties, covered 4 minutes. Flip patties and top with a slice of cheese. Grill, covered, until just cooked through, 1 to 2 minutes more.
Make aoli, mixing mayo with 1 teaspoon adobo sauce.
Spread buns with aoli and assemble burgers with cilantro, tomatillo, burger, and avocado.
Open mouth wide and enjoy! I am posting from my phone these next couple of weeks as our modem is turned in and computer is unplugged so formatting might be different. Nonetheless, I hope to be in touch. I am sure the next few weeks and the adventure of a cross-country move with three little ones will present some informative lessons on living intentionally and keeping perspective.
CANDY BAR PIE
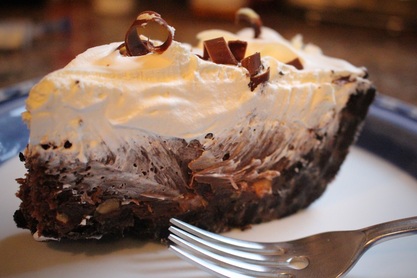
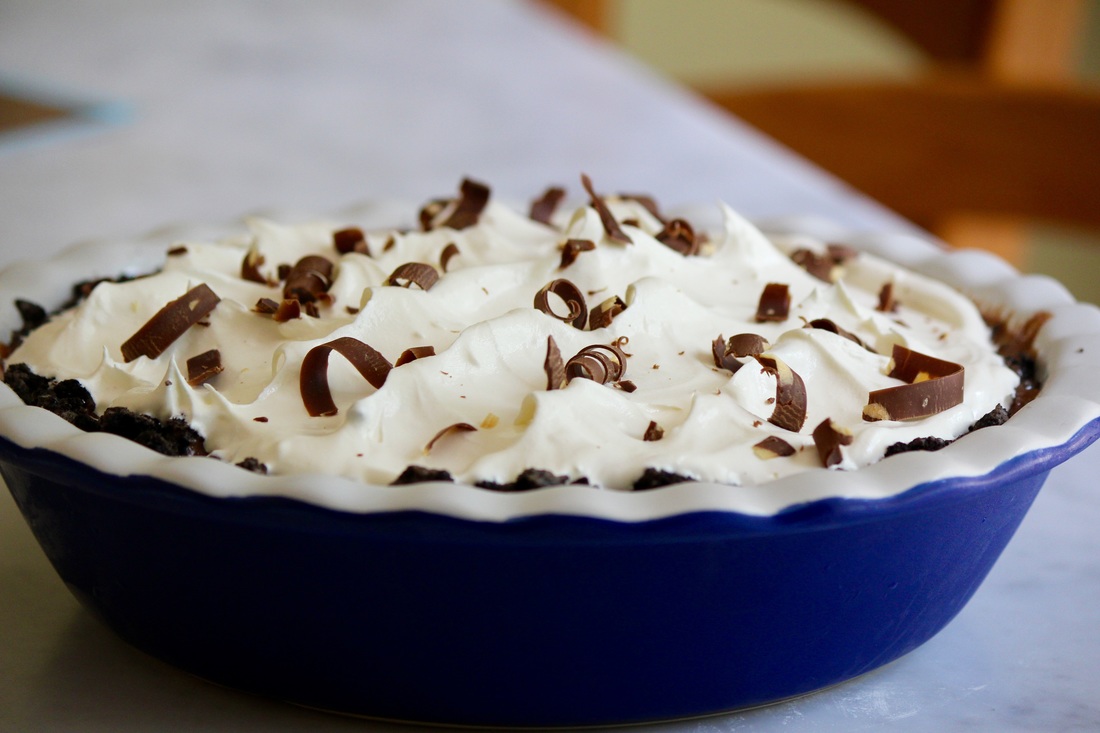
Tastē Tuesday~ There are certain desserts that are pure indulgences. This is one of them. It can't really be made healthy or even remotely light. So, we make it once a year and give ourselves permission to abandon fish, kale, etc. and delight our tastebuds in chocolate ecstasy. It is wonderful in the summer for a cold dessert...preferably shared with friends!
Chocolate Almond Candy Bar Pie
Adapted from The Joy of Cooking
Ingredients:
30 cream filled chocolate sandwich cookies (Oreos)
6 tablespoons unsalted butter, melted
6 1/4 cups miniature marshmallows
1 pound milk chocolate candy bars with almonds
1 cup heavy cream
small tub Cool Whip
Preheat oven to 400. Lightly butter a 10" pie pan. Place cookies in a sturdy plastic bag. Crush with a rolling pin to coarse 1/4" pieces. Transfer to a mixing bowl and combine well with butter. Pat the mixture over the bottom and sides of the pie pan. Bake for 7 minutes, then let cool completely on a rack.
Set aside a small block of chocolate for shavings to top the pie. Chop remaining chocolate into 1/4" inch pieces. Stirring with a wooden spoon or heatproof spatula, bring cream to a boil in large saucepan over medium heat. Add chopped chocolate and stir until the chocolate melts. Stir in the marshmallows until the marshmallows are almost filled melted. Remove from heat, tightly cover, and let stand for 5 minutes. Very gently fold the softened marshmallows into the chocolate mixture, retaining as much air as possible. (There may be a few unblended bits of marshmallow).
Pour the filling into the crust and refrigerate for 4 hours. If not serving the pie at once, press a sheet of plastic wrap directly onto the surface and refrigerate for up to 2 days. Shortly before serving, shave the reserved chocolate. Spread the cool whip over the top of the pie and sprinkle with the chocolate shavings.
Notes: I always forget and think more is better and purchase the Double-Stuffed Oreos. You really don't need the additional cream in the crust though, so normal Oreos work great. I have contemplated the grounding of the Oreos - 1/4" chunks vs. a finer crush. A finer crush would make it easier to spread it on the bottom and sides of the pie pan. However, the chunks add to the "candy bar" aspect of the pie. I end up doing a chunkier crush in the bag and then once the delectable mess is in the pie pan, I crush here and there with a spoon to get the necessary coverage.
Homemade whipped topping can be made for the top, but we prefer Cool Whip. Compared to adding another 1 cup of heavy cream to the recipe, it does save on calories and fat. Indulgence is a good thing in moderation. Over-indulgences can be dangerous!
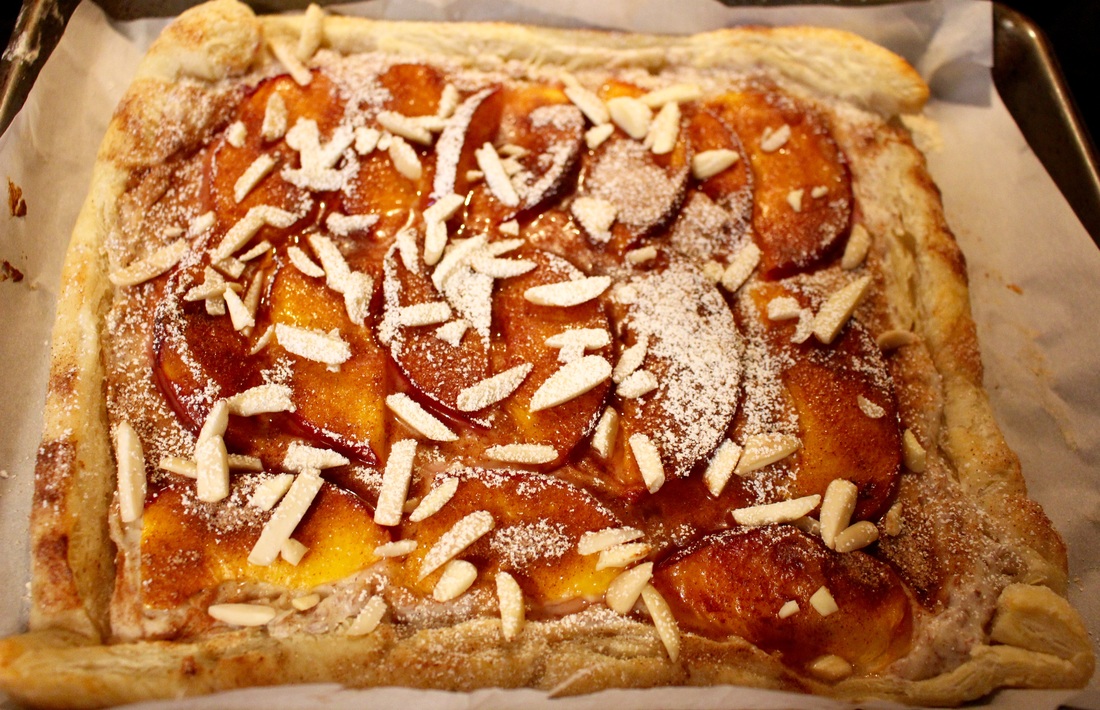
PEACH ALMOND TART
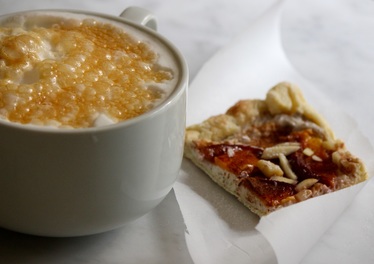
Tastē Tuesday~ Peaches are one of my favorite fruits. They are special, and a succulent peach cannot be taken for granted. In today's age where you can get watermelon, fresh berries, apples, etc. year round, peaches can only be purchased in season...if you want a sweet, juicy taste of bliss at least. Even in season, you must have the proper mix of a discerning eye and touch as well as good luck. Otherwise, you end up biting into either a crunchy and bland or bitter, mealy piece of fruit. Alas, if you have chosen the perfect peach, your bite turns into an experience of smooth, sweet, heaven. A peach's versatility also makes it quite a special little fruit. Fresh, they are a pleasant addition to any meal or snack, they can be grilled, put into pies, added to ice-cream to make a delicious ice cream shake, canned for the winter, and even doused with blue cheese and honey for a more savory salad.
My first experiment with this summer's peaches was a Peach Almond Tart. We enjoyed it warm right out of the oven...rapidly consuming 4 of the 6 servings. Warm, it was a yummy evening treat, lending itself both the feeling of summer's fresh, delicate fruits and the enjoyment of summer's last bountiful harvest that could be savored on a crisp evening at the end of the season. Summer or early fall, this tart would serve as a great ending to an al fresco dinner.
I also wanted to try it cold. Thankfully we had enough self control to put the last two slices away in the refrigerator. Although I prefer the tart served warm, cold, it was a better fit with a morning cup of coffee or as an after lunch treat. The peach takes a different note of flavor depending on whether it is warm or cold. If you make this in the future, come back and let me know which you think is best!
Why does the peach season have to be so short...if it were longer...the special memories of buying as many as possible from the roadside stand, knowing you have to eat them all before they go bad, eyeing the buckets of peaches at the grocery store each time you walk in, knowing they will soon disappear, and trying a plethora of new recipes in a couple of short months would not be so special...and the anticipation of summer would not be as exhilarating!
PEACH ALMOND TART
ADAPTED FROM ALICE CURRAH, SAVORY SWEET LIFE
TOTAL TIME: 35 MINS, SERVES: 6-9
INGREDIENTS
ADAPTED FROM ALICE CURRAH, SAVORY SWEET LIFE
TOTAL TIME: 35 MINS, SERVES: 6-9
INGREDIENTS
- 1 SHEET PRE-MADE FROZEN PUFF PASTRY
- 4 OUNCES 1/3 LESS FAT CREAM CHEESE, SOFTENED
- ⅓ CUP FLAX MEAL & FLOUR (2/3 FULL WITH WHOLE GROUND FLAX MEAL AND LAST 1/3 ALL-PURPOSE FLOUR)
- ⅓ CUP CONFECTIONERS’ SUGAR PLUS 1 TABLESPOON FOR DUSTING
- 1 EGG WHITE
- ½ TEASPOON ALMOND EXTRACT
- 1 LARGE RIPE PEACH, PIT REMOVED AND CUT INTO ⅛-INCH SLICES
- 1 TABLESPOON SUGAR
- 1 TEASPOON CINNAMON
- 2 TABLESPOONS TOASTED ALMOND SLIVERS OR SLICES
- THAW THE FROZEN PUFF PASTRY ACCORDING TO PACKAGE INSTRUCTIONS.
- ADD THE CREAM CHEESE, FLOUR, ⅓ CUP CONFECTIONERS’ SUGAR, EGG WHITE, AND ALMOND EXTRACT TO A BOWL AND MIX WITH A HAND MIXER OR THOROUGHLY BY HAND.
- PREHEAT THE OVEN TO 400 DEGREES F.
- WHEN THE PUFF PASTRY IS READY TO USE, ROLL THE SHEET ON A FLOURED SURFACE TO 12X12 INCHES.
- TRANSFER THE SHEET TO A PARCHMENT PAPER LINED BAKING SHEET.
- FOLD THE PASTRY SHEET EDGES IN ON EACH SIDE BY ½-INCH TO FORM AN INWARD SEAM.
- EVENLY SPREAD THE ALMOND CREAM OVER THE TART FROM INSEAM TO INSEAM.
- ADD THE PEACH SLICES IN A SINGLE EVEN LAYER OVER THE CREAM.
- IN A SMALL BOWL MIX THE SUGAR AND CINNAMON. SPRINKLE THE MIXTURE EVENLY OVER THE PEACH LAYER.
- BAKE THE TART FOR 20 MINUTES OR UNTIL THE EDGES ARE GOLDEN BROWN.
- REMOVE THE TART FROM THE OVEN TO COOL.
- SPRINKLE THE ALMOND SLIVERS OVER THE TART FOLLOWED BY A LIGHT DUSTING OF CONFECTIONERS’ SUGAR.
- SERVE WARM OR COLD.
BUTTERSCOTCH & WHITE CHOCOLATE CHIP BLONDIES
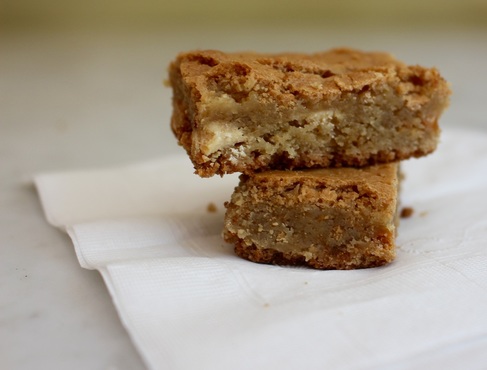
Tastē Tuesday~
Once every two months I bake treats for the volunteers who work with the special needs ministry at our church. It takes a patient and dedicated person to spend their free time playing and working with my son and all of the other special kiddos through young adults that the church ministers to. Due to the high incidence of food allergies these days, all baked treats must be nut free. I never realized how many of the goodies I enjoy have some kind of nut product in them somewhere. I always enjoy the opportunity to try a new recipe and usually have to hunt a little bit to make sure I find a yummy one that is nut-free. Last week's find was Butterscotch Blondies. I modified the recipe to make it a little bit more indulgent, and in my humble opinion, a bit more scrumptious. Truth be told...I made a double batch so I could make sure to have at least a few to keep at home to "try" and make sure they were good enough to share! I will be making these again.
Once every two months I bake treats for the volunteers who work with the special needs ministry at our church. It takes a patient and dedicated person to spend their free time playing and working with my son and all of the other special kiddos through young adults that the church ministers to. Due to the high incidence of food allergies these days, all baked treats must be nut free. I never realized how many of the goodies I enjoy have some kind of nut product in them somewhere. I always enjoy the opportunity to try a new recipe and usually have to hunt a little bit to make sure I find a yummy one that is nut-free. Last week's find was Butterscotch Blondies. I modified the recipe to make it a little bit more indulgent, and in my humble opinion, a bit more scrumptious. Truth be told...I made a double batch so I could make sure to have at least a few to keep at home to "try" and make sure they were good enough to share! I will be making these again.
Butterscotch and White Chocolate Chip Blondies
Adapted from Cooking Light, January 2007
Ingredients
2 cups all-purpose flour (about 9 ounces)
2 1/2 cups firmly packed light brown sugar
2 teaspoons baking powder
1/2 teaspoon salt
10 tablespoon unsalted butter
2 eggs
1/4 cup egg whites*
5 oz (approximately half a bag) butterscotch chips
5 oz (approximately half a bag) white chocolate chips
Preparation
Preheat oven to 350°.
Lightly spoon flour into dry measuring cups; level with a knife or use your kitchen scale to weigh 9 oz. Combine flour, sugar, baking powder, and salt in a large bowl.
Place butter in a small skillet over medium heat. Cook for 6-10 minutes or until lightly browned, stirring occasionally. Pour into a small bowl, and cool for 10 minutes. Combine butter, egg, and egg substitute, stirring with a whisk. Pour butter mixture over flour mixture; stir just until moistened. Stir in butterscotch chips and white chocolate chips. Spoon batter into a 13 x 9-inch baking pan coated with cooking spray or lined with parchment paper. Bake at 350° for 30 minutes or until a wooden pick inserted in center comes out clean. Cool in pan on a wire rack.
Helpful Notes:
* I was trying to use some store purchased egg whites I had on hand. The original recipe calls for 3/4 egg substitute. If you don't want to use egg substitute you could use 3-4 large eggs. Doing a mix of egg substitute or egg whites, and whole eggs will save you a few calories.
* If you want thicker brownies, use a smaller pan (for a double batch of dough I used one 8x8 and one 9x13).
* This recipe is from Cooking Light, but reader beware...the original serving size for a 9x13 pan is 48 servings...that is pretty small especially considering that they are on the thinner side if using the 9x13 size pan. I think of this brownie as a treat and have a normal size bar...or two!
Despite babies, little boys, and moving, I cook so posting recipes in these busy times is doable. However, I hope to get back to some Monday Moments and Fuel for Friday posts soon. When you start to see them you will know one of two things, either I'm not as tired at night and can think straight during 3am feeds or the move is complete, the hubby is back to normal working hours, and little boys 1 and 2 have started school!
SUMMER SALAD
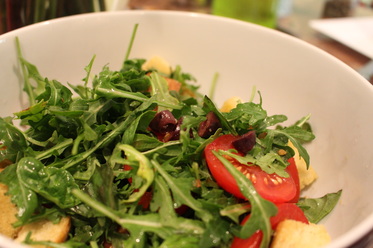
Tastē Thursday~ With a move coming up halfway through gardening season, I sadly restrained from planting my garden this year and settled for one lonely tomato plant. I am eagerly waiting for it to start producing so we can enjoy some fresh, homegrown tomatoes before we pack up and drive away. In anticipation of this year's miniature harvest, I am sharing a scrumptious and light salad that will help you enjoy some of the "fruits" of the season. I first made this at the beginning of May and used Campari Cocktail Tomatoes - they are smaller than your typical tomato and were delicious. The homemade croutons add an easy but customizable crunch. Fresh, torn mozzarella would also be a tasty addition. Light and healthy, this a perfect salad for a summer evening.
Stella Artois Tomato, Arugula, and Basil Salad
Serves 4
Adapted from kentuckyderby.com
Ingredients
5 ripe tomatoes (sliced thickly)*
1/4 cup Nicoise olives (halved)
1/4 cup loosely packed basil leaves (chopped)
4 thick bread slices (torn or cut into bitesized pieces)
Olive Oil (for bread)
4 oz. arugula leaves
6 tablespoons olive oil (for dressing)
1/4 cup red wine vinegar
1/4 cup Stella Artois
Preparation
Preheat oven to 350 degrees.
Toss torn bread in olive oil and toast for approximately 10 minutes or until golden brown. Meanwhile, in a small bowl whisk together 6 tablespoons olive oil, 1/4 cup red wine vinegar and 1/4 cup Stella Artois. Place all ingredients in salad bowl and gently toss with desired amount of dressing. Season with salt and pepper and serve.
*Tailor the number of tomatoes according to the size of the tomatoes and how much tomato you want in your salad.
A PIE FOR THE RACES
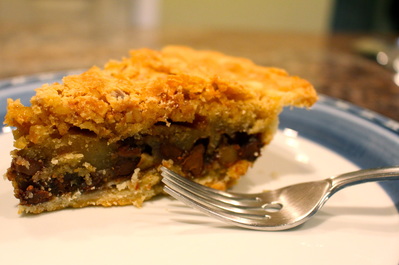
Tastē Tuesday: In honor of the first Triple Crown Winner since 1978, here is a recipe to celebrate the first of the three races, the Kentucky Derby. The Derby Pie is an official pie that originates from Kentucky, and the owners are very protective of their pie and its name. Although similar, this isn't a copycat pie. It is, however, a delicious chocolate chip cookie in a pie crust kind of pie. Simple and scrumptious, I hope you give it a try!
Ingredients
1/2 cup light butter, melted
1 cup sugar
2 eggs
1 teaspoon vanilla
2 tablespoons bourbon
1/2 teaspoon salt
1/2 cup flour
1 cup chopped walnuts
1 cup chocolate chips
1 frozen pie crust (thawed)
Instructions
Mix butter and sugar. Add eggs, bourbon and vanilla, mixing well. Add salt and flour, mixing well. Fold in walnuts and chocolate chip. Pour mixture into pie crust and bake at 325 degrees for 1 hour or until cooked through and crust is golden brown. Let cool for 1-2 hours before slicing.
For the last eight or so years, the hubby and I have watched all three races hoping to see the Triple Crown be won again. This year we continued our tradition, enjoying a Derby Day feast with a couple of close friends, crossing our fingers for the Belmont Stakes as American Pharoah crossed the finish line first at the Preakness, and even enjoying a trip to Belmont Park in early May to catch a couple of races and see the bronze statue of Seabiscuit, the last Triple Crown winner. Friday, my husband reminded me that we couldn't forget to watch the Belmont on Saturday...which we both totally spaced the next day after we spent 9 hours out and about with a motorcycle ride for little boy #1 that helped raise money for Jill's House (http://jillshouse.org/?upcoming_event=2015-ride-for-jills-house). Sitting in bed 3 hours after the race, feeding baby #3 and checking out the news because it is something I can easily do one-handed, I saw that American Pharoah had indeed won the Triple Crown. We cuddled up together and watched the race on my phone with a sleeping baby between us...how priorities change!
AIRPLANE FRUIT SALAD
Tastē Tuesday: As part of little boy #2's plane themed birthday, I made an airplane watermelon and sugar cookies. The sugar cookies were not intricate, but I did try out a buttercream frosting instead of the traditional royal icing that hardens and allows treats to be bagged without ruining the design. The buttercream crusted nicely, and I think I will use it again as it kept a more traditional sugar cookie with frosting taste and texture to the party favors!
Being that warmer temperatures are hitting the nation, fruit has been high on my consumption list lately! There are tons of simple but cute ideas to add some festivity to your fruit salad, so if entertaining is in your future for a birthday, Memorial Day Weekend BBQ, etc., google your theme. I bet you find a quick and easy way to add something special to your party table!
Being that warmer temperatures are hitting the nation, fruit has been high on my consumption list lately! There are tons of simple but cute ideas to add some festivity to your fruit salad, so if entertaining is in your future for a birthday, Memorial Day Weekend BBQ, etc., google your theme. I bet you find a quick and easy way to add something special to your party table!
Disney Planes Cake
GIRAFFE CAKE
Tastē Tuesday: Last weekend we celebrated the 1st birthday for a little sweetheart in the family. I was privileged enough to provide the cake.
ALABAMA PULLED PORK SANDWICHES
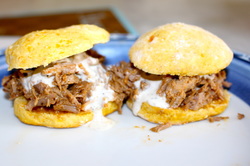
Tastē Thursday: This is a great, versatile pulled pork recipe. There are a few things I love about it...in the winter it is cozy and homey, in the summer it is casual and easy, it can be used as an appetizer or a main course. Hands on time is minimal, but when you bite into it, you would think that the cook spent the entire time roasting and seasoning the meat! It can be made ahead as well, so don't hesitate to give this one a try.
ALABAMA PULLED PORK SANDWICHES W/ WHITE BBQ SAUCE
adapted from Cooking Light
SAUCE:
1/2 cup reduced-fat mayonnaise
1 teaspoon coarsely ground fresh pepper
Dash of salt
1 1/2 - 2 Tablespoons white vinegar
Fresh lemon juice for desired consistency (about 1 teaspoon)
PORK:
1 1/4 pounds pork tenderloin, trimmed
1/2 cup apple cider vinegar
1/4 cup water
3 Tablespoons brown sugar
2 teaspoons kosher salt
3/4 teaspoon freshly ground black pepper
1/2 teaspoon ground red pepper
1/2 teaspoon chili powder
1/4 teaspoon garlic powder
BISCUITS:
2 cups all-purpose flour (9 ounces if you have a scale)
2 1/2 teaspoons baking powder
1 teaspoon salt
1/4 teaspoon cinnamon
1 cup mashed cooked sweet potato (about 3/4 pound)
2 Tablespoons brown sugar
3 Tablespoons light butter, melted
2/3 cup fat-free milk
DIRECTIONS:
Prepare sauce: Combine first three sauce ingredients in a small bowl. Add 1/2 teaspoon lemon juice and 1 1/2 tablespoon white vinegar. Add remaining, 1/2 teaspoon lemon juice and 1/2 tablespoon white vinegar for desired consistency. Cover and chill.
Prepare pork: Cut pork in half lengthwise; cut crosswise into 2 1/2-inch chunks. Combine apple cider vinegar and remaining pork ingredients in a medium saucepan; bring to a boil. Add pork to pan. Cover, reduce heat, and simmer 1 hour or until tender. Remove pork from cooking liquid; shred with 2 forks. Place pork in a serving dish; pour cooking liquid over pork.
Prepare biscuits: Preheat oven to 425°F. Whisk together flour, baking powder, and salt in a large bowl. Combine potato, sugar, butter and milk; stir well. Pour over dry ingredients; stir until a soft dough forms (dough will feel sticky). Turn dough out onto a floured surface; knead lightly 5 to 6 times. Roll dough into a 10-inch circle; cut 24 biscuits with a floured 2-inch biscuit cutter. You'll need to cut and then re-roll scraps and cut again. Place biscuits on a baking sheet coated with cooking spray. Bake for 12 minutes or until lightly browned. Remove biscuits from pan; cool on a wire rack.
To assemble sandwiches, place pork and a dollop of the white barbecue sauce in between two biscuits.
*To prepare this meal in advance, make the sauce and refrigerate, bringing to room temperature if desired before serving. Biscuits can be made a day or two ahead of time as well; store in an air-tight container. Pork: cook according to recipe and refrigerate it in the braising liquid. Gently reheat prior to serving.
Quick tips:
Thank you for reading! Are you following me on Bloglovin'? Subscribe with the link at the top right of the page to have each post delivered straight to your e-mail box.
ALABAMA PULLED PORK SANDWICHES W/ WHITE BBQ SAUCE
adapted from Cooking Light
SAUCE:
1/2 cup reduced-fat mayonnaise
1 teaspoon coarsely ground fresh pepper
Dash of salt
1 1/2 - 2 Tablespoons white vinegar
Fresh lemon juice for desired consistency (about 1 teaspoon)
PORK:
1 1/4 pounds pork tenderloin, trimmed
1/2 cup apple cider vinegar
1/4 cup water
3 Tablespoons brown sugar
2 teaspoons kosher salt
3/4 teaspoon freshly ground black pepper
1/2 teaspoon ground red pepper
1/2 teaspoon chili powder
1/4 teaspoon garlic powder
BISCUITS:
2 cups all-purpose flour (9 ounces if you have a scale)
2 1/2 teaspoons baking powder
1 teaspoon salt
1/4 teaspoon cinnamon
1 cup mashed cooked sweet potato (about 3/4 pound)
2 Tablespoons brown sugar
3 Tablespoons light butter, melted
2/3 cup fat-free milk
DIRECTIONS:
Prepare sauce: Combine first three sauce ingredients in a small bowl. Add 1/2 teaspoon lemon juice and 1 1/2 tablespoon white vinegar. Add remaining, 1/2 teaspoon lemon juice and 1/2 tablespoon white vinegar for desired consistency. Cover and chill.
Prepare pork: Cut pork in half lengthwise; cut crosswise into 2 1/2-inch chunks. Combine apple cider vinegar and remaining pork ingredients in a medium saucepan; bring to a boil. Add pork to pan. Cover, reduce heat, and simmer 1 hour or until tender. Remove pork from cooking liquid; shred with 2 forks. Place pork in a serving dish; pour cooking liquid over pork.
Prepare biscuits: Preheat oven to 425°F. Whisk together flour, baking powder, and salt in a large bowl. Combine potato, sugar, butter and milk; stir well. Pour over dry ingredients; stir until a soft dough forms (dough will feel sticky). Turn dough out onto a floured surface; knead lightly 5 to 6 times. Roll dough into a 10-inch circle; cut 24 biscuits with a floured 2-inch biscuit cutter. You'll need to cut and then re-roll scraps and cut again. Place biscuits on a baking sheet coated with cooking spray. Bake for 12 minutes or until lightly browned. Remove biscuits from pan; cool on a wire rack.
To assemble sandwiches, place pork and a dollop of the white barbecue sauce in between two biscuits.
*To prepare this meal in advance, make the sauce and refrigerate, bringing to room temperature if desired before serving. Biscuits can be made a day or two ahead of time as well; store in an air-tight container. Pork: cook according to recipe and refrigerate it in the braising liquid. Gently reheat prior to serving.
Quick tips:
- Measure out the sweet potato. If you add too much, it will make an already sticky dough pretty difficult to work with. When rolling out the dough, have plenty of flour handy.
- Serving size varies depending on how you plan to serve the dish (appetizer vs. main course). It is easily doubled or tripled for a crowd! As written:
Thank you for reading! Are you following me on Bloglovin'? Subscribe with the link at the top right of the page to have each post delivered straight to your e-mail box.
TRIPLE LAYER LEMON CHEESECAKE
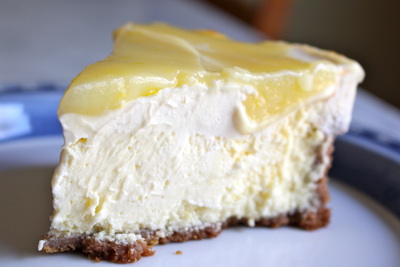
Tastē Tuesday:I love an occasional indulgence in the form of cheesecake from the Cheesecake Factory when the opportunity arises, but I have actually only made two, three tops, including this one. There are a ton of "how-to's" on-line, so I am not going to write a diatribe on how to create the perfect cheesecake. After all, with two or three attempts under my belt, who would keep reading anyways? I did make a cheesecake last fall that looked amazing but didn't make the cut for sharing here. However, Easter Sunday's dessert was luscious and creamy, and definitely worthy of passing along. Since I was happy with how this cheesecake turned out, I will share a few tips along the way so if you try it out for yourself, you aren't doing it completely blind.
Cheesecake screams calories to me, so I adjusted the recipe a little bit to try to lighten it up. I didn't go overboard as I would prefer a special holiday indulgence than a dry cheesecake that no one wants to eat. Here is the recipe...a few tinkering suggestions can be found at the end.
Triple Layer Lemon Cheesecake
adapted from Creating A Stir
2 cups cinnamon graham cracker crumbs
1/2 cup finely chopped pecans
6 tablespoons light butter, melted
1 cup sugar, divided
1 (8-ounce) package 1/3 less fat Philadelphia cream cheese, softened
2 (8-ounce) packages Regular Philadelphia cream cheese, softened
3 large eggs
2 1/2 teaspoons grated lemon zest
1/4 cup fresh lemon juice
1 tablespoon vanilla extract, divided
2 cups light sour cream
Lemon Glaze
Using a food processor, finely chop graham crackers and pour into medium size bowl. Using food processor again, finely chop pecans and mix with the graham crackers. Pour in butter and 2 tablespoons sugar. Press mixture onto bottom and sides of a greased 9-inch springform pan. If looking for a more traditional cheesecake with crust only on the bottom, pour mixture in a little bit at a time and press only on bottom to desired thickness. Bake at 350 degrees for 5 minutes.
I did bottom and sides though if I were to make again, especially for company, I would probably just do the bottom crust. The sides were hard to get in uniform thickness and made clean slices more difficult to cut. If presentation is important, stick to the bottom crust only.
Beat cream cheese and 3/4 cup sugar at medium speed with an electric mixer until creamy; add eggs, 1 at a time, beating well after each addition. Add lemon zest, juice, and vanilla, beating well. Pour into cooled crust.
Bake at 350 degrees for 45 minutes or until set. Let cool on a wire rack for 30 minutes.
This is where cheesecakes are a bit tricky because all ovens vary a bit. I set my kitchen timer for 42 min and 30 seconds and pulled the cheesecake out at about 43 - 44 minutes. I didn't want to over bake but didn't want a runny cheesecake either...this is where experience helps! I could have probably pulled it out right at 42 1/2 minutes and been okay, but I was perfectly happy with the texture of the finished product. A tip for knowing when your cheesecake is done can be found at the very bottom.
Combine sour cream, remaining 2 tablespoons sugar, and 2 teaspoons vanilla; spread over top of cake. Increase oven temperature to 500 degrees and bake 5 minutes. Let cool slightly.
Spread Lemon Glaze over top. Cover and chill 8 hours or until set.
Remove sides of pan to serve.
Lemon Glaze
1/2 cup sugar
4 teaspoons cornstarch
Pinch of salt
3/4 cup water
1/3 cup fresh lemon juice
1 egg yolk, lightly beaten
1 tablespoon light butter
1 teaspoon grated lemon zest
Combine sugar, cornstarch, and salt in a 1-quart heavy saucepan. Combine 3/4 cup water, lemon juice, and egg yolk; add to sugar mixture and cook over low-medium heat, stirring occasionally, until thickened. Stir in butter and lemon zest. Let cool 10 minutes or until no longer steaming.
Begin making the Lemon Glaze while the first layer of the cheesecake is cooking. It takes awhile for the mixture to thicken. The original recipe said to cool the Glaze only slightly, and in my attempt to also do a million other things, I did just that. As you can see from the picture below, the lemon glaze mixed a little bit on the left side of the cake. Although the taste was not affected, once again, for a beautiul finished product, allow the lemon glaze to cool for at least 10 minutes before spreading it on top of the cheesecake. Mine was too warm for the sour cream, pushing the sour cream layer to the edge a bit and swirling it as well instead of making a perfectly clean third layer.
Extra Tips and Ideas:
Sit down with a dainty fork and savor every luscious bite!
- Softened cream cheese to or nearly to room temperature. This will ensure a creamy filling with no residual lumps of cream cheese in the batter.
- Pull your cheesecake out of the oven when the edges are set but the center remains a bit jiggly.
- Run a thin knife along the outer edge of the pan immediately after pulling the cheesecake and sour cream layer from the oven. This will be easier if you don't have the crust pressed onto the sides. This will help your cheesecake from cracking as it cools.
- The lemony aspect of this cheesecake makes for a delightful spring treat. However, a couple of other considerations if you are up for experimenting...Keep the first layer or first and second layer of cheesecake, topping with a raspberry or blueberry topping.
Sit down with a dainty fork and savor every luscious bite!
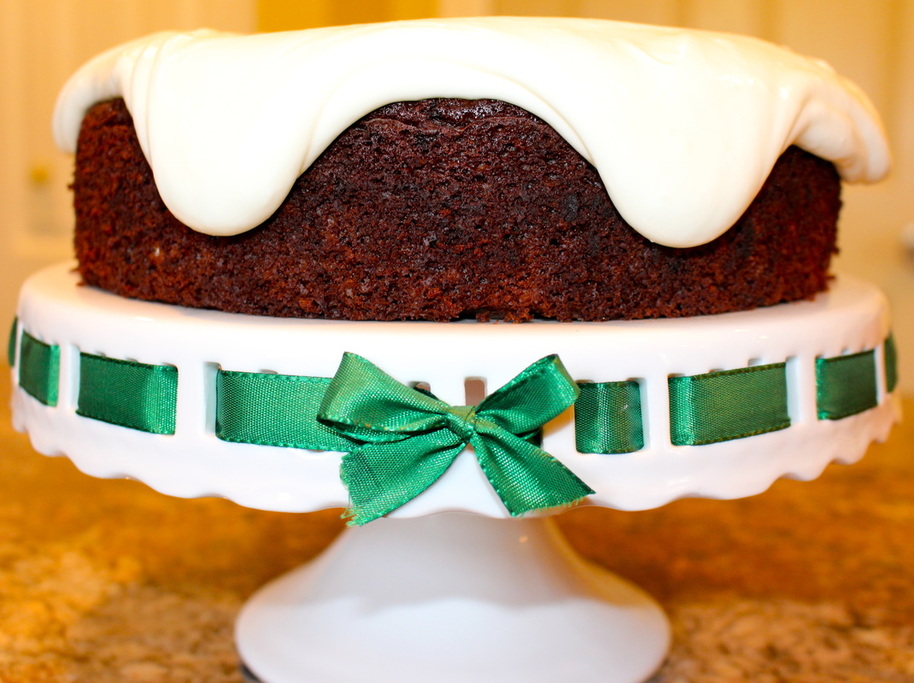
Tastē Tuesday: I realize I am a week late, but Happy St. Patrick's Day. Using the holiday as an excuse to try a new recipe, I made a Chocolate Guinness Cake in celebration. It was supposed to resemble a frothy mug of Guinness beer and included a cup of the Irish Stout. The cake was a yummy, dense and moist chocolate. The frosting was cream cheese based, which made for the head appearance. It did its job well, but both the hubby and I thought that the cream cheese/chocolate combination wasn't spectacular. Consequently, I am sharing a picture of the cake but will experiment next March with the recipe to see if I can modify the frosting while keeping the intent behind of the cake! If you favor that combination, and would like the recipe, let me know! In celebration of our Irish roots, we also enjoyed a scrumptious dinner of bangers and mashed potatoes and whiskey cheddar with crackers. Yum! I hope you enjoyed your St. Patrick's Day and the beginning of spring.
An Irish Prayer
May God give you...
For every storm, a rainbow,
For every tear, a smile,
For every care, a promise,
And a blessing in each trial.
For every problem life sends,
A faithful friend to share,
For every sigh, a sweet song,
And an answer for each prayer.
An Irish Prayer
May God give you...
For every storm, a rainbow,
For every tear, a smile,
For every care, a promise,
And a blessing in each trial.
For every problem life sends,
A faithful friend to share,
For every sigh, a sweet song,
And an answer for each prayer.
VEGGIES FOR BREAKFAST
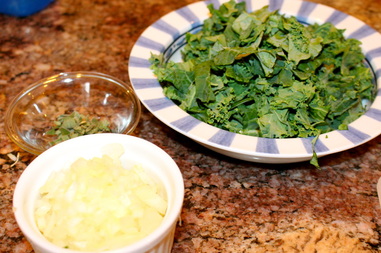
Tastē Thursday: Both of our boys were early risers as little kiddos. Once they began sleeping in past seven thirty on frequent occasions, we adjusted our Sunday routine to take advantage of a little bit more sleep. We said goodbye to our church's early service, and although the mid-morning service is the most crowded service, it is wonderful to have at least one morning a week when we don't have to set the alarm. Another bonus has been the addition of brunch! I love breakfast food, but no one in the family wakes up and eats huge breakfasts. Sunday brunch has allowed me to try out a lot of recipes that otherwise looked delicious but remained in a closed cookbook.
A week ago, I tried a recipe that was like eating a rainbow of veggies in the most delicious manner. It was a great use of a plethora of leftovers I had as well - talk about satisfying two meal must-do's with one dish.
Butternut Squash, Kale and Sausage Frittata
Adapted from Williams Sonoma Kitchen
Ingredients:
Directions:
Preheat an oven to 425ºF. Line a baking sheet with aluminum foil.
In a bowl, toss the squash with 3/4 Tbs. of the olive oil and season with salt and pepper. Transfer to the prepared baking sheet. Roast until the squash is tender, 20 to 30 minutes. Adjust your baking time according to how you sliced your squash. Thinner slices will be fork-tender quicker and will burn if left unattended.
In a large bowl, whisk together the eggs, salt and pepper. Fold in the 1 tsp. sage, the 1 tsp. parsley and the pecorino romano.
In a 9" oven-safe skillet over medium-high heat, warm 1/2 Tbs. olive oil. Add the sausage and cook, breaking up the large pieces, until well browned, about 8 minutes. Drain on paper towels.
In the same pan over medium heat, warm 3/4 Tbs. of the olive oil. Add the onion and cook, stirring occasionally, until tender, 6 to 8 minutes. Add the kale and cook, stirring occasionally, until wilted, 2 to 3 minutes. Season with salt and pepper. Add the squash and sausage to the pan.
Add the egg mixture to the pan, stirring to evenly distribute the vegetables. Cook until the edges of the frittata are golden and the center is beginning to set, 2 to 5 minutes.
Dollop the top of the frittata with the ricotta cheese. Move skillet into the oven (still at 425ºF from roasting the butternut squash) until the eggs are set.
Remove frittata from oven and let rest for 5 minutes. Cut into slices and serve. Serves 4.
A week ago, I tried a recipe that was like eating a rainbow of veggies in the most delicious manner. It was a great use of a plethora of leftovers I had as well - talk about satisfying two meal must-do's with one dish.
Butternut Squash, Kale and Sausage Frittata
Adapted from Williams Sonoma Kitchen
Ingredients:
- about 1/2 lb. butternut squash slices, (seed, peel and cut squash crosswise
into 1/4-inch slices or buy pre-chopped squash and cut into the size you desire) - 2 Tbs. olive oil
- Kosher salt and freshly ground pepper, to taste
- 6 eggs
- 1 tsp. chopped fresh sage, plus more for garnish
- 1 tsp. dried parsley (1 Tbs. chopped fresh flat-leaf parsley can also be used, but that unless you have some in your refrigerator, buying a whole bunch for 1 Tbs. is unnecessary)
- 1/2 cup (2 oz.) finely grated pecorino romano cheese
- 1/4 lb. bulk mild Italian sausage
- 1/2 small yellow onion, diced
- 5 kale leaves, stemmed and cut into 1-inch
strips - 1/4 cup (2 oz.) ricotta cheese
Directions:
Preheat an oven to 425ºF. Line a baking sheet with aluminum foil.
In a bowl, toss the squash with 3/4 Tbs. of the olive oil and season with salt and pepper. Transfer to the prepared baking sheet. Roast until the squash is tender, 20 to 30 minutes. Adjust your baking time according to how you sliced your squash. Thinner slices will be fork-tender quicker and will burn if left unattended.
In a large bowl, whisk together the eggs, salt and pepper. Fold in the 1 tsp. sage, the 1 tsp. parsley and the pecorino romano.
In a 9" oven-safe skillet over medium-high heat, warm 1/2 Tbs. olive oil. Add the sausage and cook, breaking up the large pieces, until well browned, about 8 minutes. Drain on paper towels.
In the same pan over medium heat, warm 3/4 Tbs. of the olive oil. Add the onion and cook, stirring occasionally, until tender, 6 to 8 minutes. Add the kale and cook, stirring occasionally, until wilted, 2 to 3 minutes. Season with salt and pepper. Add the squash and sausage to the pan.
Add the egg mixture to the pan, stirring to evenly distribute the vegetables. Cook until the edges of the frittata are golden and the center is beginning to set, 2 to 5 minutes.
Dollop the top of the frittata with the ricotta cheese. Move skillet into the oven (still at 425ºF from roasting the butternut squash) until the eggs are set.
Remove frittata from oven and let rest for 5 minutes. Cut into slices and serve. Serves 4.
PEANUT BUTTER CHIP COOKIE +
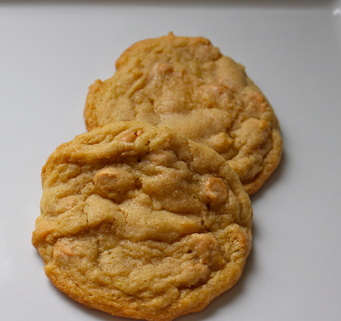
Tastē Tuesday~ It was yet another snow day and although I thought having another batch of cookies in the house was probably dangerous, the thought of pulling warm, gooey cookies out of a hot oven seemed like the right thing to do on such a chilly day. I had a bag of peanut butter chips that had been hanging out in the pantry, left behind from a fall cooking endeavor that never happened. I have made peanut butter cookies before but not peanut butter chip cookies, so out they came for an experiment. Thankfully for my midline, the hubby loved them! This is of particular importance because he prefers candy over baked goods and typically doesn't pull his full share in cookie intake. After shoveling the driveway and clearing the cars, he came in for lunch...and dessert straight from the oven. His words, "I have eaten three and didn't want to stop." Hmmm...we may have a winner here or shoveling just made him extra hungry. The next day I came home, and he told me he ate three more after lunch and wanted more. Two days in a row - I suppose I have a keeper. Peanut butter chips are fairly mild, so I may try the recipe with chocolate chips as well. I have chocolate chip cookie recipes stacking up...I see a sugar cookie-type experiment in my future!
I adapted the recipe from the recipe Reese's used to put on their peanut butter chip package, adding some peanut butter and experimenting with a bit with the butter. The original recipe was intended to be a peanut butter chip cookie, not a peanut butter cookie. The cookies from the recipe below are still not peanut butter cookies with chips added. However, there is a subtle hint of peanut butter while maintaining the texture that more closely resembles a chocolate chip cookie. If you get a chance to try them, let me know how they turn out!
Peanut Buttery Peanut Butter Chip Cookie
Ingredients
1/2 cup light butter, 1/4 cup butter salted butter, softened
1 cup sugar
1/2 cup light brown sugar
1 generous teaspoon vanilla
2 eggs
2 cups unsifted flour
1 teaspoon baking soda
1/4 cup peanut butter (this is an estimate; I took a knife and decided at the last minute to add a couple of scoops)
1 (10 oz) bag peanut butter chips
Directions
Cream butter, sugars, and vanilla until light and fluffy (make sure your butter is softened so you can use a bowl, spoon, and some good old arm strength - don't use a mixer). Add peanut butter. (Since the peanut butter was an afterthought for me, I added them at the very end. I think it would combine easier and more thoroughly if added at this step.)
Add eggs and stir well. Combine flour and baking soda. Add to batter and mix well. Stir in chips. Place by teaspoon fulls onto cookie sheet covered in parchment paper. Bake 350 degrees for about 10 minutes. Cook until bottoms begin and edges begin to brown but tops remain soft. Cool completely on wire rack.
For those of you who don't make cookies often, next week I will share a savory and versatile dish that is a bit more nutritious.
Thank you for reading! Are you following me on Bloglovin'? Subscribe with the link at the top right of the page to have each post delivered straight to your e-mail box.
Thank you for reading! Are you following me on Bloglovin'? Subscribe with the link at the top right of the page to have each post delivered straight to your e-mail box.
BATTLE OF THE SUGAR COOKIE
Tastē Thursday~ I love to try new recipes, even when I have a go-to recipe, just in case there is something better I've been missing out on. When it comes to things like cookies, this is tough because there are a million recipes out there for a simple sugar or chocolate chip cookie, I don't make cookies all that often, and when I do, unless it is incredibly different, it is difficult to identify nuances between the recipes when I haven't made the previous recipe in months. Big dilemma...I know!
I happen to be making a lot of sugar cookies at the moment, and although I didn't have the time to try more than two recipes, I was able to make two and do a side-by-side taste test. It proved to be an interesting exercise, and I think I may have saved myself some more random sugar cookie baking down the road.
I happen to be making a lot of sugar cookies at the moment, and although I didn't have the time to try more than two recipes, I was able to make two and do a side-by-side taste test. It proved to be an interesting exercise, and I think I may have saved myself some more random sugar cookie baking down the road.
I'm going to jump to the outcome first...and then share lessons learned and a recipe. Drum roll....sorry to disappoint but there was no clear winner! To say I was a bit disappointed after anticipating this awesome taste test opportunity would be an accurate statement. I'm sure you were hoping for more too. Alas, the experience wasn't a complete loss, and I'm sure the scale will account for that in the morning as well.
Lessons Learned:
1. Taste and texture were for all sense and purposes imperceptible. What does make difference: how thick you roll the dough and how long you bake your cookie. Thinner cookie = crunchier cookie, thicker cookie yields a softer cookie (at least for these two recipes).
2. For a sugar cookie, frosting is probably the more important factor. In my limited experience, (cookies really aren't my forte) there are two primary frostings: royal icing and buttercream frosting. Royal icing is used for more intricate decorating and hardens nicely providing the consumer a wonderful ability to transport them stacked without ruining the beautiful design or to put them in bags without losing all of the goodness to the top of the bag. All but the bottom two heart cookies in the above pictures use royal icing. Buttercream frosting is most delish...but if made with butter, at room temperature, this frosting will not harden quickly and has the potential to get messed up. Buttercream using shortening instead of real butter will form a crust a little quicker allowing for layers of frosting decoration (think eyes on the snowman, writing, etc.). Buttercream will remain softer than royal icing so it can still be a bit precarious when stacking or bagging cookies, but is a thicker, tastier, and richer option to a thinner layer of royal icing, especially if you are doing an afternoon of fun cookie decorating with the kids and not trying to make a specific design for favors, gifts, etc.
3. I don't bake or eat cookies with the idea that anything about it is going to be healthy; they are for an occasional and yummy treat. But, since I can't eat just one cookie and the recipes didn't have a clear taste winner, I looked at nutrition to see if that would make one recipe the decisive victor. Interestingly, one recipe had butter, sugar, flour, etc. while the other had butter, sugar, flour, etc. + heavy cream. I thought hands down I knew which recipe was going to win. My calculations were not an exact science because I made the first batch a couple of weeks ago and don't remember the exact cookie count it yielded. Further, the size of each cookie differed a small amount since they were shapes. However, looking at the ingredient measurements, the proportions are similar, and I forged ahead with my best yield estimates. The results were a bit surprising.
a) The total calories and fat grams in a batch of sugar cookies, even though it is basically just flour, sugar, and dairy, are higher than I expected, and I was sure happy I got to divide by a couple dozen!
b) Sugar has a lot of calories (completely empty ones to make it that much worse), even though it doesn't have fat. I fell off the sugar-cutting bandwagon when the holidays hit, and I need to crawl back on!
c) Just a slight variation in a key ingredient...butter...makes a significant impact. The first recipe called for 1 cup butter. The second recipe called for 3/4 cup butter and 1/2 cup cream. Cutting just 1/4 cup butter allowed the addition of the 1/2 cup cream without a significant impact on calories and no impact on fat. At the end of the day, there was a difference of about 20 calories and 1.25 grams of fat per cookie.
Overall, the winner of the sugar cookie war, in my humble opinion, is recipe #1. All of the ingredients are cupboard/refrigerator staples, so it doesn't require any special trip to the store, and the nutrition label reads just a little bit better. If you can limit yourself to one cookie, it doesn't matter much, but if you sit down with a big glass of milk or tea and eat 4 cookies, recipe #1 saves you 80 calories.
Conclusions: I didn't know I could ever write so much about a sugar cookie!
I'll make my husband's family sugar cookie on Christmas because that is the family tradition (completely different recipe not part of this test). The rest of the time I will make the sugar cookie dough recipe below...until I come across one that looks different enough that I feel the need to try my experiment again....
No Fail Sugar Cookies (courtesy of Food.com)
Ingredients:
3 cups flour
1 1/2 teaspoons baking powder
1 cup butter
1 cup sugar
1 egg
1 teaspoon vanilla
1/2 teaspoon salt
Directions:
Cream butter and sugar
Add eggs and vanilla
Mix dry ingredients and add to butter mixture.
Mix well.
Chill for 1 to 2 hours (I prefer at least overnight)
Roll to desired thickness and cut into desired shapes
Bake on an ungreased baking sheet at 350 degrees for 8 to 10 minutes or until just beginning to turn brown around the edges
Tips:
Bake on parchment paper to avoid any possible sticking and to make clean up easier.
Set your timer for 7 minutes and check your cookies to make sure you don't get too crispy. How thick you roll your dough will determine how long or short they actually need to stay in the oven.
Now that I have said all of that...two years ago I made cookie lollipops. They were soft and thick. I am pretty sure I used a completely different recipe than the two I recently tried. The question that is going to bother me now is, were they that way because I rolled them to be thick or did I choose the recipe especially for a cookie that would rise a bit more and stay soft. Hmmmmm....time to go dig through my recipe folder I guess!
If you have a sugar cookie recipe you think is the ultimate - I would love to hear from you!
DEEP-DISH CHOCOLATE CHIP, CARAMEL, TOFFEE COOKIES
Tastē Tuesday~ 24 hours late...those darn snow days!
Just the name of this recipe is likely to make your mouth start watering. When I came across it, while looking for something completely different and not nearly as indulgent, I just had to store it away for a future splurge. After staring at a bag of caramels that have been in my pantry since a fall idea to make fancy caramel apples inspired me to buy them but never actually make them, I decided now was the time to try the recipe. Candy manufactures actually do make "caramel bits," however, they are hard to find, and cutting caramel squares into quarters works just as well.
These cookies in a dish were actually quite easy to whip up. If you are a cookie dough feign, as yours truly, and actually have dough to put in the oven, here is what I learned:
1) These are a yummy treat!...and being "deep-dish" would be delicious with a scoop of ice-cream. I couldn't bring myself to add even more dessert on top of dessert. Best served warm!
2) I did not add extra toffee bits as suggested and found that I could not really taste them within the cookie. The caramel and chocolate are much more pronounced. The next time I make them, I am going to substitute peanut butter chips for the toffee bits. Once again, I bought peanut butter chips for something I never made, so this experiment might happen sooner rather than later. If it does, I'll update you on how that works out. I love peanut butter and can't imagine it won't be amazing!
3) I realize that not everyone has ramekins sitting in their cupboards, so with a bit of the leftover dough, I made regular cookies to see how they would turn out. To be honest...I actually liked the regular cookies better...I think. There isn't anything about this recipe that mandates it be cooked in a ramekin, so if a cookie sheet is what you have, don't shy away from trying these out. If you do choose to make regular cookies, try to push the caramel bits in towards the center of the cookie before putting them in the oven. The caramel gets nice and toasty and will ooze out onto the cookie sheet if at the very edge of the cookie, and you don't want to lose any of the caramel goodness. In case this happens despite best precautions, line your cookie sheets with parchment paper to make clean-up a breeze.
If you are ready to satisfy a craving, here is the recipe:
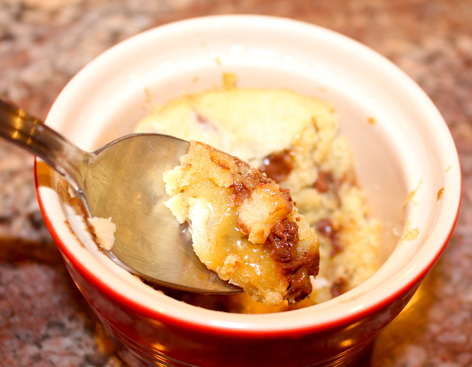
Deep-dish Chocolate Chip, Caramel, Toffee Cookies
4 cups all-purpose flour
1 tsp baking powder
1 tsp baking soda
1 1/2 cups butter, softened
1 cup granulated sugar
1 cup packed brown sugar
2 large eggs
1 Tbs vanilla extract
1 cup semi-sweet chocolate chips
1 cup caramel bits
1/2 cup toffee bits
Preheat oven to 375 degrees F. Grease baking ramekins.
Combine first three ingredients in a bowl and set aside.
Beat butter and sugars until creamy; beat in eggs and vanilla.
Gradually stir in flour mixture.
Stir in chocolate chips, caramel, and toffee, reserving some of each for topping cookie dough (just makes it prettier).
Place 1/4 cup of cookie dough in each ramekin. Place ramekins on a cookie sheet and bake at 375 for 12-15 minutes or until golden brown.
Let cool on wire rack for about 10 minutes before serving. Top with ice cream and extra toffee bits if desired.
You can freeze any extra cookie dough, just place 1/4 cup balls onto a parchment lined cookie sheet and freeze for 1 hour. Once frozen, transfer cookie dough balls to a freezer bag and seal tightly then put back in the freezer until you are ready to eat. Thaw before baking.
Thank you for reading! Are you following me on Bloglovin'? Subscribe with the link at the top right of the page to have each post delivered straight to your e-mail box.
Thank you for reading! Are you following me on Bloglovin'? Subscribe with the link at the top right of the page to have each post delivered straight to your e-mail box.
MONTE CRISTO
Tastē Tuesday~
I am always looking for a way to spice a sandwich up. Since I pack a sandwich a few times a week in my hubby's lunch, the last thing he wants on the weekend is a repeat of Monday through Friday. Sandwiches are easy though, and I haven't been able to give them up as weekend lunches. At a restaurant in Denver I fell in love with the Monte Cristo Sandwich. I found a recipe and made it one or two times, but it seemed so indulgent that I haven't made it in years...plus I can't find that original recipe! I prefer my Monte Cristo sweet (it can also be savory) and Sunday is brunch day at my house, so this week I thought I would try a new recipe and strike the perfect balance between a sweet breakfast and a savory lunch.
I found a recipe that was not deep fried and started cooking! The results were quite yummy, and I hope to be able to satisfy my craving a little more often. If you have never tried this souped up ham and cheese, I dare you to...just once.
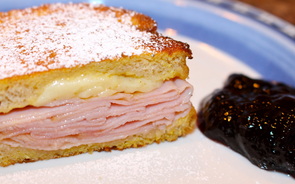
Monte Cristo Sandwich
Makes 2 sandwiches
Adapted from Amy Johnson, www.shewearsmanyhats.com
INGREDIENTS
INSTRUCTIONS
Makes 2 sandwiches
Adapted from Amy Johnson, www.shewearsmanyhats.com
INGREDIENTS
- 2 eggs
- pinches of salt and pepper
- 4 slices sturdy white bread (or white bread of preference)
- 2 tablespoons mustard
- 1 tablespoon mayonnaise (I cut back from 2 and will probably try no mayo next time)
- ½ pound thinly sliced brown sugar ham
- ½ ounce shredded gruyere cheese
- 1 1/2 tablespoons butter
- optional garnish/toppings: powdered sugar, preserves
INSTRUCTIONS
- Beat eggs in a shallow dish (large enough to fit a sandwich) along with a few pinches of salt and pepper. Set aside.
- Smooth mustard on two slices of bread and mayonnaise on the other two slice. On the mayonnaise side, scatter a small amount of cheese, layer ham, add another layer of cheese. Put the mustard slice on top and slightly press down.
- Over medium heat melt butter in skillet.
- Dip and coat each sandwich in beaten egg, and place in skillet. Cook sandwiches 2-3 minutes on each side, until browned to liking and cheese has melted.
- Sprinkle with powdered sugar, if desired, and serve with preserves. We enjoyed a triple berry preserve.
- DEVOUR!
GOURMET SALMON: COMPANY OR WEEKDAY DINNER
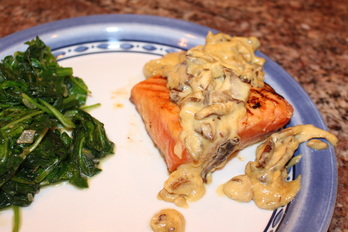
Tastē Tuesday~ If you are trying to incorporate more fish into your diet, this is a great dish to try. Although it does require an overnight marinade, the actual hands-on time is is short and the results are delicious. We had this for dinner tonight, but I also wouldn't hesitate to serve to guests I was trying to impress. We originally found the recipe at our grocery store, Wegmans, but have made some modifications to make it our own. I hope you give it a try…and if you do, I would enjoy hearing what you think about it! As is typical with my photos, I would love to have plated this in a more picture worthy fashion, as it could be made to look quite delicate and delish, but instead, as I pulled out my camera, I opted for quick service and eating warm fish with the three men waiting for me at the table.
Miso Marinated Salmon with Miso Mushroom Cream Sauce
(serves 2 but easily multiplied)
Salmon
2 (6 ounce) salmon fillets, skinned
1/2 tsp sea salt
1/3 cup sweet Miso (we use Miko brand)
3/4 tsp sake
2 tablespoons mirin
3/5 tablespoon sugar
Miso Cream Sauce
1/2 Tbsp vegetable oil
2 king oyster mushrooms or royal trumpet mushrooms, sliced lengthwise (for garnishing)
pinch salt & pepper
3 shiitake mushrooms, stems removed, sliced
1 oyster mushroom, roughly chopped
1 small cluster (about 1 fingers width) beech mushrooms, roughly chopped
1 1/2 tablespoons butter
1 1/2 tablespoons sweet Miso
1/3 cup heavy cream
Directions
Salmon: coat each salmon fillet with 1/4 tsp salt; let rest 30 minutes (Pre-salting the salmon draws out the moisture, allowing the miso marinade to be fully absorbed into the fillets.)
Whisk together miso, sake, mirin, and sugar or combine in large zipper-style plastic bag and thoroughly mix.
Pat fillets dry with paper towels. Add to bag with miso mixture. Turn bag to coat salmon thoroughly; release air and seal. Marinate in refrigerator for 24 hours.
Day of serving: Preheat oven to 225 degrees. Blot marinated salmon with paper towels, removing excess marinade (miso burns easily). Heat skillet over medium high heat and sear fillets for 1 minute. Flip salmon and place in oven (about 25 minutes) until thermometer reads 126 - 130 degrees (126 degrees is the temperature salmon is cooked to when using the sous vide technique. We have found this to be our optimal salmon temperature. However, it is a matter of preference. The American Test Kitchen proposes 125, whereas many cook to 130 and find all pinkness gone but not an overdone fillet.).
Transfer to a clean platter and rest 2-5 minutes. To serve, arrange salmon atop sauteed trumpet mushroom halves and dollop with Miso Mushroom Sauce (directions below).
Miso Cream Sauce Directions: Heat vegetable oil in a small skillet on high. Add trumpet mushrooms; brown on all sides. Season with a pinch of salt and pepper. Transfer to clean plate and top with prepared salmon. Set aside.
Saute remaining mushrooms until slightly softened and browned. Add butter, stir. Add miso and cream; stir. Turn off heat. Pour over salmon.
The above is great for those nights when you are preparing a special dinner or have company. However, if this is something you try for an easy weekday dinner, here are some modifications.
1) Skip the trumpet mushroom part - it is a pretty garnish, but additional mushrooms aren't necessary and this saves time.
2) Don't worry about ensuring the perfect mixture of mushrooms, and if you aren't a huge mushroom fan, reduce the amount a bit. Roughly chop a few shiitake and one or two additional exotic mushrooms, saute them, add the butter, etc.
3) As written, the sauce (butter, miso, cream) is doubled. We usually double our sauce just to make sure we have enough. Tonight, I also left mine on the heat while I made little boy #1's macaroni and cheese and it thickened…which was fine, but a thinner sauce covers more fish without doubling calories…and makes for a prettier presentation.
PAN-CAKE
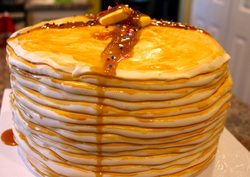
Tastē Tuesday~
Two days after Christmas, my friend's daughter celebrated her 6th birthday with a pajama and pancake party. I had never heard of the theme before, but what a creative and fun party! I have tucked the idea away in the back of my mind.
I was excited to make pancake sugar cookies for the favor bags and a cake that looked like a stack of pancakes. I thought I took more than one picture of the cookies, but I just discovered that I did not! So here is one picture of the pancake sugar cookies and a couple pictures of the cake. Don't they make you want to make a bee-line for IHOP?
Christmas Birthday Cake
Tastē Tuesday~
One of my favorite Christmas traditions that my family passed down was celebrating Christmas with a birthday cake for Jesus. Each Christmas Eve my parents had a Christmas party; the evening culminating in singing "Happy Birthday" and cutting into the cake.
When I married but before our Christmas parties started, we had the birthday cake on Christmas Eve. We much prefer to share with all of our friends and family, and this year, we held our own third annual Christmas party…though since most of our audience is under the age of 8, we have ours a couple of weeks before the 25th and in the middle of the day before nap time! Santa arrives and lets each child sit on his lap to tell him their most desired gifts. After the fun festivities, we bring are reminded of the real reason for our gathering by cutting into the cake laden with meaning. Two components of the cake cannot be seen in the picture below - the angel and the star. I hang them from the light fixture above the cake.
The meaning of the Christmas birthday cake can be modified for the audience. Older children and adults can begin by reading Luke 1-2 or for younger kids, a simple retelling of Jesus' birth may be easier. Then…the cake itself can be explained.
*The shape of the cake is round with no end, showing that God's love is never ending.
*The cake is chocolate (dark), signifying our dark hearts before we know Jesus. We can't get into heaven when our hearts are so full of sin.
*The angel reminds us of the good tidings that were brought to the shepherds the night of Jesus' birth. It also reminds us of the good news we can bring to others.
*The star reminds us of the star over Bethlehem and how the wise men followed it to worship the Lord Jesus. It reminds us that we should worship and follow Him everyday.
*The red candles remind us of Jesus' blood that was shed for the forgiveness of our sins.
*As you light the candles, the light shows us that Jesus can shine in our hearts if we ask Him to be our Savior. Each one of them, totaling 12, reminds us to let His light shine every month of the year, not just at Christmas time.
*The evergreens that surround the cake remind us of something living and growing. If we have accepted Jesus into our hearts, we are going to grow and get to know Him more.
Despite the specific aspects of the cake that lend significance, each year I have modified the cake a bit. This year, I returned to a basic chocolate cake with vanilla frosting. Two years ago I did a frozen chocolate cake with peppermint ice cream filling. Last year, it was chocolate with peppermint frosting.
I always enjoy capturing the kids' attention because they are so eager to get a piece of cake, and then hearing them recount parts of the Christmas story. Who knew a cake could tell us the greatest news on Earth!
I always enjoy capturing the kids' attention because they are so eager to get a piece of cake, and then hearing them recount parts of the Christmas story. Who knew a cake could tell us the greatest news on Earth!
PUMPKIN PIE WITH TOASTED PECAN PRALINE TOPPING
I must be honest and say that Thanksgiving dessert always gives me a moment of pause. I have never been a huge fan of pecan pie - it seems to sweet, which is odd coming from a girl who has an incredibly large sweet tooth. Pumpkin pie is okay for one slice after dinner, but the rest of the pie always seems to sit on the counter as a quiet reminder of the holiday that just passed. Fruit pie doesn't seem traditional or unique enough since we indulge in those throughout the year.
At a craft fair a couple of weeks before Thanksgiving, a local caterer was handing out samples of a pumpkin dessert with a pecan struesel-like topping...and it was delish! I made a mental note that this might be my dessert solution. I found the recipe below and gave it a try last Thursday. I had to keep myself from going back for seconds, and the pie was eaten in its entirety - success!
At a craft fair a couple of weeks before Thanksgiving, a local caterer was handing out samples of a pumpkin dessert with a pecan struesel-like topping...and it was delish! I made a mental note that this might be my dessert solution. I found the recipe below and gave it a try last Thursday. I had to keep myself from going back for seconds, and the pie was eaten in its entirety - success!
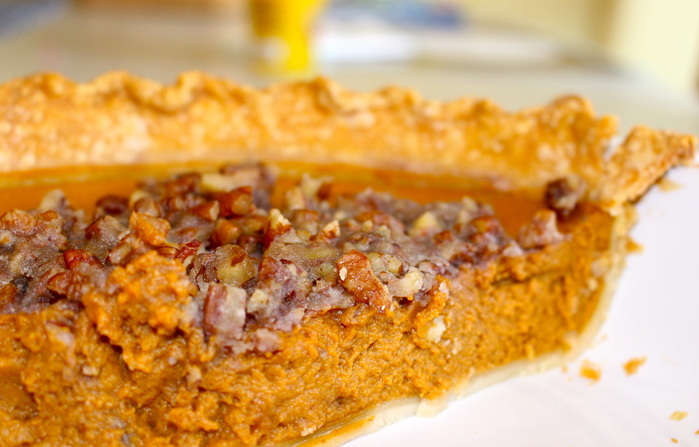 Recipe courtesy of Amy Johnson from the blog "She Wears Many Hats," with a few comments of my own
PUMPKIN PIE WITH TOASTED PECAN PRALINE TOPPING
INGREDIENTS
1 (9 inch) deep-dish pie crust, unbaked, or better yet, bake your own
for pie filling:
2 eggs
½ teaspoon salt
1¼ teaspoons ground cinnamon
½ teaspoon ground ginger
¼ teaspoon ground nutmeg
¾ cup brown sugar (either light or dark is fine); I used half of each
15 onces pure pumpkin puree
8 ounces evaporated milk
for Pecan Praline Topping:
2 tablespoons butter, softened
2 tablespoons brown sugar5 tablespoons toasted chopped pecans, lightly toasted
INSTRUCTIONS
- Preheat oven to 425°F, and prepare pie crust for filling.
- In a large bowl whisk the eggs, salt, ground cinnamon, ground ginger, and ground nutmeg together until combined well.
- Add brown sugar, and pumpkin, and whisk together.
- Gradually stir in evaporated milk until blended, and pour mixture into an unbaked 9" deep dish pie crust, place pie on baking sheet and bake at 425°F for 15 minutes, reduce oven temperature to 350°F and continue baking for 40 minutes. **I decided to cover my crust after it had baked for awhile…promptly forgot and ended up with a crispy crust. Since this pie bakes for quite awhile, I highly suggest covering your crust!
- Prepare Pecan Praline Topping while pie is baking, by mixing together all topping ingredients (softened butter, brown sugar and toasted pecans) in a small bowl until combined.
- Carefully top pie with Pecan Praline Topping and cook for another 5-10 more minutes. Before removing pie from oven, check for doneness; knife, cake tester, or toothpick inserted in center of pie should come out clean.
- Let cool for at least 1½ hours. Serve right away or refrigerate covered until ready to serve. Garnish with whipped cream or cool whip if desired.
DESPICABLE ME
This past weekend I worked on another cake with a movie theme from a movie I have never seen. It was for a two year old…I'm thinking if he has watched it enough to be his favorite, perhaps I'll pick it up to watch on one of our cold winter weekends. Is it worth watching?
I must say "thank you" to my parents and hubby who kept themselves and my little boys entertained while I decorated most of the day on Saturday!
I must say "thank you" to my parents and hubby who kept themselves and my little boys entertained while I decorated most of the day on Saturday!
SOUP FOR THE SOUL
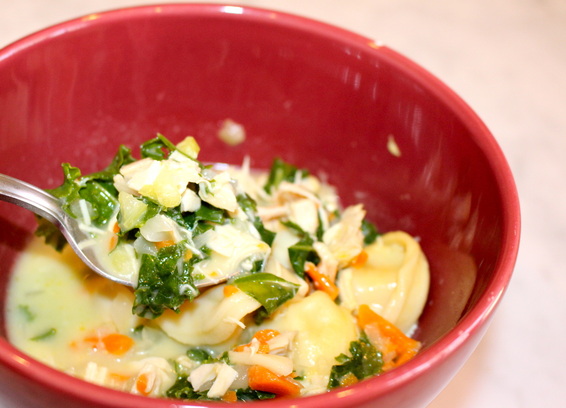
Tastē Tuesday:
I am freezing…literally. The temps today are supposed to hang right around 32, and according to CNN, all 50 states reported temperatures below freezing at one point this morning; yes even Hawaii! Personally, I love it…it gets me into the holiday spirit. However, I have been consuming soup and hot chocolate to avoid continually bumping up the heat in the house.
There isn't a better way to welcome cold weather than with a hearty, healthy soup, and I have just the recipe…Creamy Chicken Tortellini Soup with Kale. This soup is not only for those with heartier appetites but is easy and can be made for dinner without hours of simmering.
Creamy Chicken Tortellini Soup with Kale
adapted from Jenna, Nov 2012 at eatliverun.com
1 small yellow onion, minced
1 large stalk celery, chopped
2 carrots, chopped
1 tablespoon olive oil
2 tablespoons flour
2 cups roughly chopped cooked rotisserie chicken
2.5 quarts chicken stock
1/4 teaspoon garlic powder
1 bunch kale, roughly chopped
9 oz package fresh cheese tortellini
1/2 cup heavy cream
1.5 teaspoons salt
pepper to taste
Directions:
Heat the oil in a large soup pot over medium heat. When hot, add the onion, celery and carrot. Saute´ until veggies are just tender and the onions are translucent. Sprinkle in the flour and mix well to coat all of the vegetables. Continue sautéing for another 2 minutes, stirring constantly.
Slowly pour in 2 quarts chicken stock. Add the chopped chicken (I prefer mine chopped in chunks, but the original recipe calls for shredded chicken), garlic powder, tortellini and salt and bring mixture to a boil. Reduce heat and simmer for about five minutes until veggies are tender and pasta is plump and soft.
Stir in the cream and the kale. Continue simmering for another couple of minutes until the kale wilts in the soup. Season with pepper to tate. If your soup appears too thick, add the remaining stock. As the soup cools, the pasta will soak up the broth, so keep additional stock for re-heating the leftovers…which taste just as yummy!
Time: 30 minutes
I hope as you read this, you find yourself warm both inside and out.
The Frozen Phenomenon

Tastē Tuesday: When I first started learning how to decorate cakes, I heard about a nonprofit organization called Icing Smiles. They provide custom celebration cakes and other treats to families impacted by the critical illness of a child. I put my name on the list of bakers, but after a couple of years, never expected to be contacted since I am still much in the practice and not professional phase of my baking career.
However, about a month ago, I received an email asking if I could do a cake for a little girl's 7th birthday. The timing worked out, and I correctly assumed this would be my first opportunity to jump onto the Frozen bandwagon. Living in a house with only males, I have yet to see the movie every little girl has been crazy about for over a year. It was fun to do something involving princesses, and I hope the little girl had a wonderful birthday party!
However, about a month ago, I received an email asking if I could do a cake for a little girl's 7th birthday. The timing worked out, and I correctly assumed this would be my first opportunity to jump onto the Frozen bandwagon. Living in a house with only males, I have yet to see the movie every little girl has been crazy about for over a year. It was fun to do something involving princesses, and I hope the little girl had a wonderful birthday party!
Fall Gourmet
Tastē Tuesday: Once each fall we create a festive, warm, and cheesy dining event: Roast Pumpkin with Cheese Fondue. I meant to photo document the entire process, but my husband prepared the meal with a friend while us girls lingered on the couch. When the delectable, consumable center pieces were on the table, I realized there were no pictures, so just a quick snap shot of the finished product is shown.
We are big fondue fans, and this dish elevates a normal cheese fondue into something spectacular. Served inside a roasted pumpkin, not only do you get to enjoy scrumptious melted cheese and a seasonal squash, but it also decorates the table reminding you to be thankful for the friends/family you are enjoying your meal with and the warm comforts of home and food. Make sure when you scoop some gooey cheese and bread out of the pumpkin to also scoop some tender pumpkin onto your plate as well.
We are big fondue fans, and this dish elevates a normal cheese fondue into something spectacular. Served inside a roasted pumpkin, not only do you get to enjoy scrumptious melted cheese and a seasonal squash, but it also decorates the table reminding you to be thankful for the friends/family you are enjoying your meal with and the warm comforts of home and food. Make sure when you scoop some gooey cheese and bread out of the pumpkin to also scoop some tender pumpkin onto your plate as well.
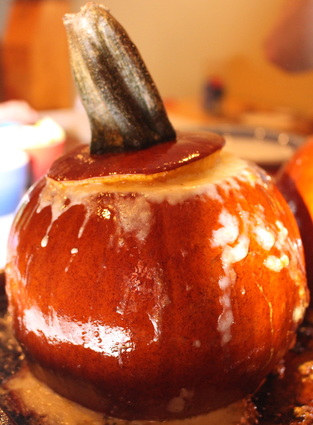
ROAST PUMPKIN WITH CHEESE FONDUE
Adapted from Gourmet, November 2008
Serves 4 (Main Course)
Active Time: 25 minutes, Start to Finish: 2 hours
1 (15-inch) baguette, cut into 1/2" slices
1 (8 pound) or 2 (4 pound) orange pie pumpkins
1 1/2 cups heavy cream
1 teaspoon salt + some for seasoning
1/2 teaspoon pepper
1/2 cup reduced-sodium chicken broth
1/2 cup white wine
1/2 teaspoon grated nutmeg
2 1/2 cups coarsely grated Gruyere (6 ounces)
2 1/2 cups coarsely grated Emmental (6 ounces)
1 tablespoon olive oil
Preheat oven to 450 degrees with rack in lower third of oven. Toast baguette slices in 1 layer on a baking sheet in oven until tops are crisp (bread will still be pale), about 7 minutes. Transfer to a rack to cool.
Remove top of pumpkin by cutting a circle around the stem. Scrape out seeds and any loose fibers from inside pumpkin with a spoon (including top of pumpkin). Season inside of pumpkin well with salt.
Whisk together cream, broth, nutmeg, 1 tsp salt, and 1/2 tsp pepper in a bowl. Mix together cheeses in another bowl.
Put a layer of toasted bread in bottom of pumpkin, then cover with about 1 cup cheese and about 1/2 cup cream mixture. Continue layering bread, cheese, and cream mixture until pumpkin is filled to about 1/2 inch from top, using all of cream mixture. (You may have some bread and cheese left over.)
Cover pumpkin with top and put in an oiled small roasting pan. Brush outside of pumpkin all over with olive oil. Bake until pumpkin is tender and filling is puffed, 1 1/4 to 1 1/2 hours.
Serve with large chunks of granny smith apples and mini dill pickles.
**Note: Pumpkin can be filled 2 hours before baking and chilled. This recipe halves well if you only want to make one 4 lb pumpkin for two or as an appetizer for a larger party.
Trick or treat
Tastē Tuesday
Simple, sweet, and yummy! Hope you have a fun Halloween.
CHORIZO & PEPPADEW PEPPER GRILLED CHEESE
|
Tastē Tuesday: The next couple of weeks will bring some sweet stuff again, but for today, I have one more savory recipe to share. I adapted it from a website I just discovered and plan on exploring, http://foodie.crush.com. This was a great grown-up grilled cheese sandwich with mouth-watering flavors. The peppadew peppers I used weren't very spicy, but I did leave them off the small sandwich we made for little boy #2. A winner with both the adults and kids! Ingredients 4 slices sturdy white bread—I used a garlic loaf from the local bakery 6 ounces Manchego, grated 1/2 cup cooked (crumbled) chorizo sausage 2 pinches of smoked paprika 5 pickled peppadew peppers, sliced Instructions
Note: If you don't have a panini press, use a nonstick fry pan. Place the sandwich carefully in the pan and cook for 3-4 minutes with a lid on, flip, and cook for another 2-3 minutes. For added flavor, butter the outer sides of bread, but to shave off some calories stick to cooking spray. |
|
A well-rounded bowl
Tastē Tuesday: We have a couple of tried and true Ahi Tuna recipes, but by the end of this summer we were looking for something new. We tried this bowl and loved it. Besides eating the fish with a different flavor, this recipe provides veggies, and a very healthy grain, quinoa, all in one dish.
Seared Tuna Tataki Quinoa Bowl
Recipe adapted from Eating Well: March/April 2014
Makes: 4 servings
Total Time: 45 minutes
INGREDIENTS
Seared Tuna Tataki Quinoa Bowl
Recipe adapted from Eating Well: March/April 2014
Makes: 4 servings
Total Time: 45 minutes
INGREDIENTS
- 1 cup thinly sliced red onion
- 1/4 cup reduced-sodium soy sauce
- 3 tablespoons lime juice
- 2 tablespoons mirin (see Tips)
- 1 tablespoon finely grated ginger
- 2 cups water
- 1 cup quinoa
- 1 pound ahi (yellowfin) tuna (see Tips)
- 1/4 teaspoon salt
- 1/4 teaspoon freshly ground pepper
- 3 tablespoons canola oil, divided
- 1 1/3 cups matchstick-cut carrots
- 1 1/3 cups matchstick-cut seeded cucumber
- Combine onion, soy sauce, lime juice, mirin and ginger in a 7-by-11-inch (or similar-size) baking dish. Set aside to marinate.
- Bring water to a boil in a medium saucepan. Stir in quinoa. Reduce heat to a simmer, cover and cook until the grains are tender and reveal their spiraled germ, about 15 minutes. Remove from heat, uncover and fluff.
- Meanwhile, season tuna on both sides with salt and pepper. Heat 1 tablespoon oil in a large skillet over high heat. Add tuna and sear for 1 minute on each side for medium-rare. Transfer to a cutting board and cut into 1/2-inch slices. Remove the onions from the marinade with a slotted spoon and reserve; transfer the sliced tuna to the marinade. Gently toss to coat and let sit 5 minutes. Use tongs to transfer the tuna back to the cutting board and cut into cubes.
- Add the remaining 2 tablespoons oil to the marinade; stir 3 tablespoons of the mixture into the quinoa. Divide the quinoa among 4 shallow bowls and top with equal portions of the tuna, reserved onions, carrot, and cucumber. Drizzle with the remaining marinade and serve immediately. TIPS & NOTES
- Mirin is a sweet, low-alcohol rice wine essential in Japanese cooking. Look for it in your supermarket with the Asian or gourmet ingredients. It will keep for several months in the refrigerator. An equal portion of sherry or white wine with a pinch of sugar can be used as a substitute.
- When choosing ahi (yellowfin) tuna look for U.S.-caught fish (from the Atlantic or the Pacific)—it’s most likely to be sustainably fished. Sushi-grade fish is best for this recipe since it is not cooked all of the way through.
AN ANCIENT GRAIN FOR A BETTER TOMORROW
Tastē Tuesday: Multigrain Pilaf with Sunflower Seeds
After lasts week's indulgent coffee cake, I wanted to give you a healthy recipe this week, though not lacking in flavor. One of the ingredients to a good diet is variety, and I don't mean of the Starburst, Reese's PB cups, M&Ms kind! Instead of merely a rice pilaf, this recipe has pearl barley, brown rice, and bulgar. I must admit, I think this is the first time I have cooked pearl barley and bulgar in my own kitchen. Our awesome grocery store has self serve bins of all kinds of grains, dried fruits, etc. so I was able to trial this recipe without buying barley, brown rice, and bulgur in bulk, but if all you can find is a container, don't let that deter you- this is a side dish worth making over and over again.
The original recipe is from Cooking Light, September 2006 (can't believe it took me 8 years to pull it out my cache of recipes and try it!). I made a couple of modifications for ease of ingredients and to cut out a step or two, so the recipe below is the recipe I actually made. Bon Appétit!
Ingredients:
1 teaspoon canola oil, divided
1 teaspoon low fat butter
1/2 cup thinly sliced leek (about 1 large leek - just white/very light green portion)
1 1/4 cups water
3/4 cup fat-free, less-sodium chicken stock
1/4 cup uncooked pearl barley
1/4 cup short grain brown rice
1/4 cup dried Craisins
2 tablespoons uncooked bulgur
2 tablespoons chopped fresh parsley
3 tablespoons roasted sunflower seed kernels
1/8 teaspoons salt
1/8 teaspoon freshly ground black pepper
Preparations:
Heat a Dutch oven over medium heat; add 1 teaspoon oil and butter. Add leek; cook 4 minutes or until tender, stirring frequently to avoid burning. Add 1 1/4 cups water and next 3 ingredients (through rice); bring to a boil Cover, reduce heat, and simmer 35 minutes. Stir in Craisins and bulgur; cover and simmer 10 minutes or until grains are tender. Remove from heat; stir in 1/8 teaspoon salt, sunflower seeds, parsley, and pepper. Serve immediately.
Tastē Tuesday: Indulgent doesn't begin to describe this coffee cake we enjoyed Sunday morning. I found the recipe perusing a magazine on a waiting room table a couple of years ago and was waiting for apple season to try it out. We were not disappointed...this is even holiday morning worthy! The recipe may seem intimidating at first because there are three different components, but each component is easy and the entire cake can be made the day before it is to be delightfully consumed. I hope you enjoy!
Caramel Apple Coffee Cake
Found in Southern Living September 2012 and slightly modified by yours truly
Ingredients
2 tablespoons light butter
3 cups peeled and thinly sliced apples (I used a variety of 4 small to medium apples)
--------------------------------------------------------------------------------------------------------------------------------------
1/2 cup butter, softened (I used regular salted butter but will substitute light butter next time)
1 cup sugar
2 large eggs
2 cups all-purpose flour
2 teaspoons baking powder
1/2 teaspoon salt
2/3 cup milk (I used whole milk because I needed to use it up but will use fat-free next time)
2 teaspoons vanilla extract
Preparation
1. Preheat oven to 350º. Melt 2 tablespoons light butter in a large skillet over medium-high heat; add apples; saute´ 8 minutes or until softened. Remove from heat; cool completely (about 30 minutes).
2. Meanwhile, prepare Streusel Topping and Caramel Sauce.
3. Beat 1/2 cup softened butter at medium speed with an electric mixer until creamy; gradually add sugar, beating well. Add eggs, 1 at a time, beating until blended after each addition.
4. Combine flour, baking powder, and salt; add to butter mixture alternately with milk, beginning and ending with flour mixture. Beat at low speed until blended after each addition. Stir in vanilla. Pour batter into a greased and floured 9-inch springform pan; top with apples. Drizzle with 1/2 cup (about half) of the Caramel Sauce; sprinkle with Streusel Topping. Lightly press the topping down.
5. Bake at 350º for 45 minutes. Cover loosely with aluminum foil to prevent excessive browning; bake 25 minutes or until center is set. Cool in pan on a wire rack for 10 to 30 minutes; run a plastic knife around the outer edge of the pan to separate cake and any sticky caramel from the side. Remove sides of pan. If serving immediately, the cake can now be enjoyed. Cut with care as the warm cake will be more crumbly than a cooled cake. Otherwise, cool completely on wire rack (about 1 1/2 hours).
*Although a wooden pick may not come out entirely clean due to the caramel sauce, apples, and streusel topping, I recommend still conducting the test. I used a wooden skewer and was able to tell the cake was done. You will probably be able to tell the difference between cake batter and caramel or streusel. In my opinion, it is better to err on a longer time in the oven than cutting into the cake and finding the center uncooked!
** The original recipe says to drizzle another 1/2 cup Caramel Sauce on the cake after it has cooled completely. Especially if enjoying at breakfast or brunch, this would make the cake extremely sweet. I skipped this step, and my sweet tooth knew none the better. If enjoying for dessert and not worried about a little bit more sugar, you have extra caramel sauce to use.
*** A 9x13 glass pan can be used in place of the 9" springform if desired; just make sure to grease and flour it.
Streusel Topping
Ingredients
1 1/2 cups all-purpose flour
1 cup chopped pecans
1/2 cup light butter, melted
1/2 cup firmly packed light brown sugar
1/4 cup granulated sugar
1 1/2 teaspoons ground cinnamon
1/4 teaspoon salt
Preparation
Stir together flour, pecans, melted butter, brown sugar, granulated sugar, cinnamon, and salt until blended. Let stand 30 minutes or until firm enough to crumble into small pieces
* This makes a lot of Streusel Topping - think looking through the pastry shop window and seeing that square of coffee cake with the 1/2 inch of topping on top. This recipe could easily be cut in half if desired.
Caramel Sauce
Ingredients
1/2 cup firmly light briwn sugar
1/4 cup regular salted butter
2 tablespoons whipping cream
2 tablespoons light Karo syrup
Preparation
Bring brown sugar, butter, whipping cream, an syrup to a boil in a medium saucepan over medium-high heat, stirring constantly; boil, stirring constantly, 2 minutes. Remove from hear, and cool 15 minutes before serving. Store in an airtight container in the refrigerator up to 1 week. To reheat, microwave on high for 15 seconds or just until warm; stir until smooth
*Makes about 1 cup of sauce. If you have sauce left over, it is great with fresh, sliced apples or on top of vanilla ice-cream.
Tastē Tuesday: The weather was crisp, the sky bright blue, and the entire day proclaimed that it was the first day of fall. I thought I would keep it simple today and share a favorite fall quote and a picture of a simple spiced cake I made to celebrate the season.
“FALL HAS ALWAYS BEEN MY FAVORITE SEASON. THE TIME WHEN EVERYTHING BURSTS WITH ITS LAST BEAUTY, AS IF NATURE HAD BEEN SAVING UP ALL YEAR FOR THE GRAND FINALE.” —LAUREN DESTEFANO, WITHER
“FALL HAS ALWAYS BEEN MY FAVORITE SEASON. THE TIME WHEN EVERYTHING BURSTS WITH ITS LAST BEAUTY, AS IF NATURE HAD BEEN SAVING UP ALL YEAR FOR THE GRAND FINALE.” —LAUREN DESTEFANO, WITHER
Tastē Tuesday: Fish has always been a bit intimidating to me. It has never been one of my favorite food groups...until I became married to a man who loved fish and under the auspices of how healthy it is, insisted we eat it once a week. Going from a once a year fish consumer to a weekly one has taken some time...and a few arguments! Living near the water for the past seven years, I must admit I am converted.
Nonetheless, walking up to the seafood department and seeing an entire fish laying there with its eyes bulging out me still kind of makes me uncomfortable. I prefer to slide on over to the nice fillets and just pick out a couple. Thanks to a cooking method I discovered, I can now prepare an entire fish, leaving the cleaning and gutting to the seafood clerk of course!
Having prepared this dish multiple times now, I cringe at the memory of a trip to Greece where I turned down the freshly caught and expertly prepared fish just because there was no way my dinner plate was going to have an entire fish laying on it. I hope that if you have always stopped short of this seafood culinary adventure, this inspires you to take a leap into the ocean and try something new :).
The best thing about this recipe: one fillet (each fish provides two fillets) is only 140 calories. This a great start to a healthy dinner!
